

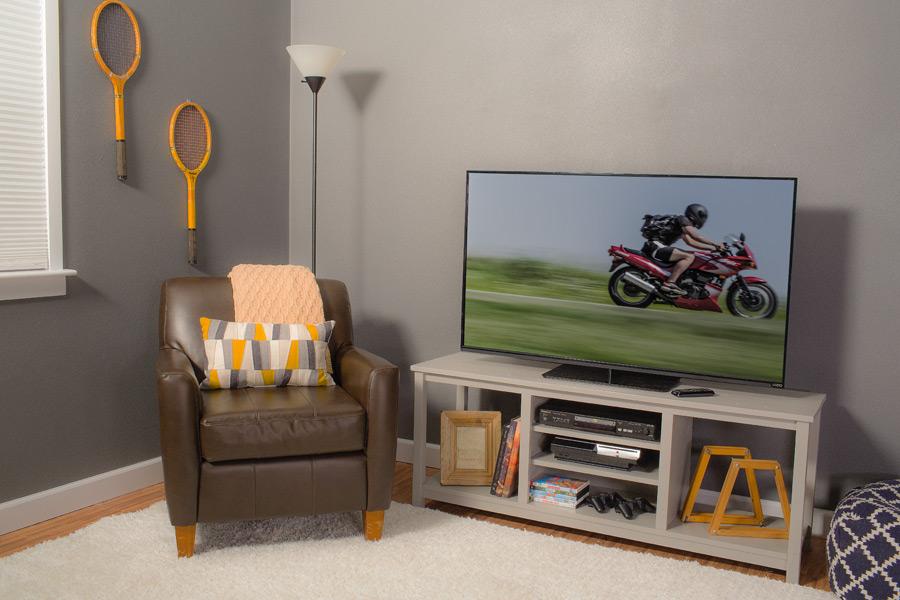


Create a stylish home for your television with this simple, good-looking stand. It offers space for a large flat-screen TV, and has additional space for components. Plus, there’s extra space that you can use to house speakers or to display some of your favorite things.
Tools
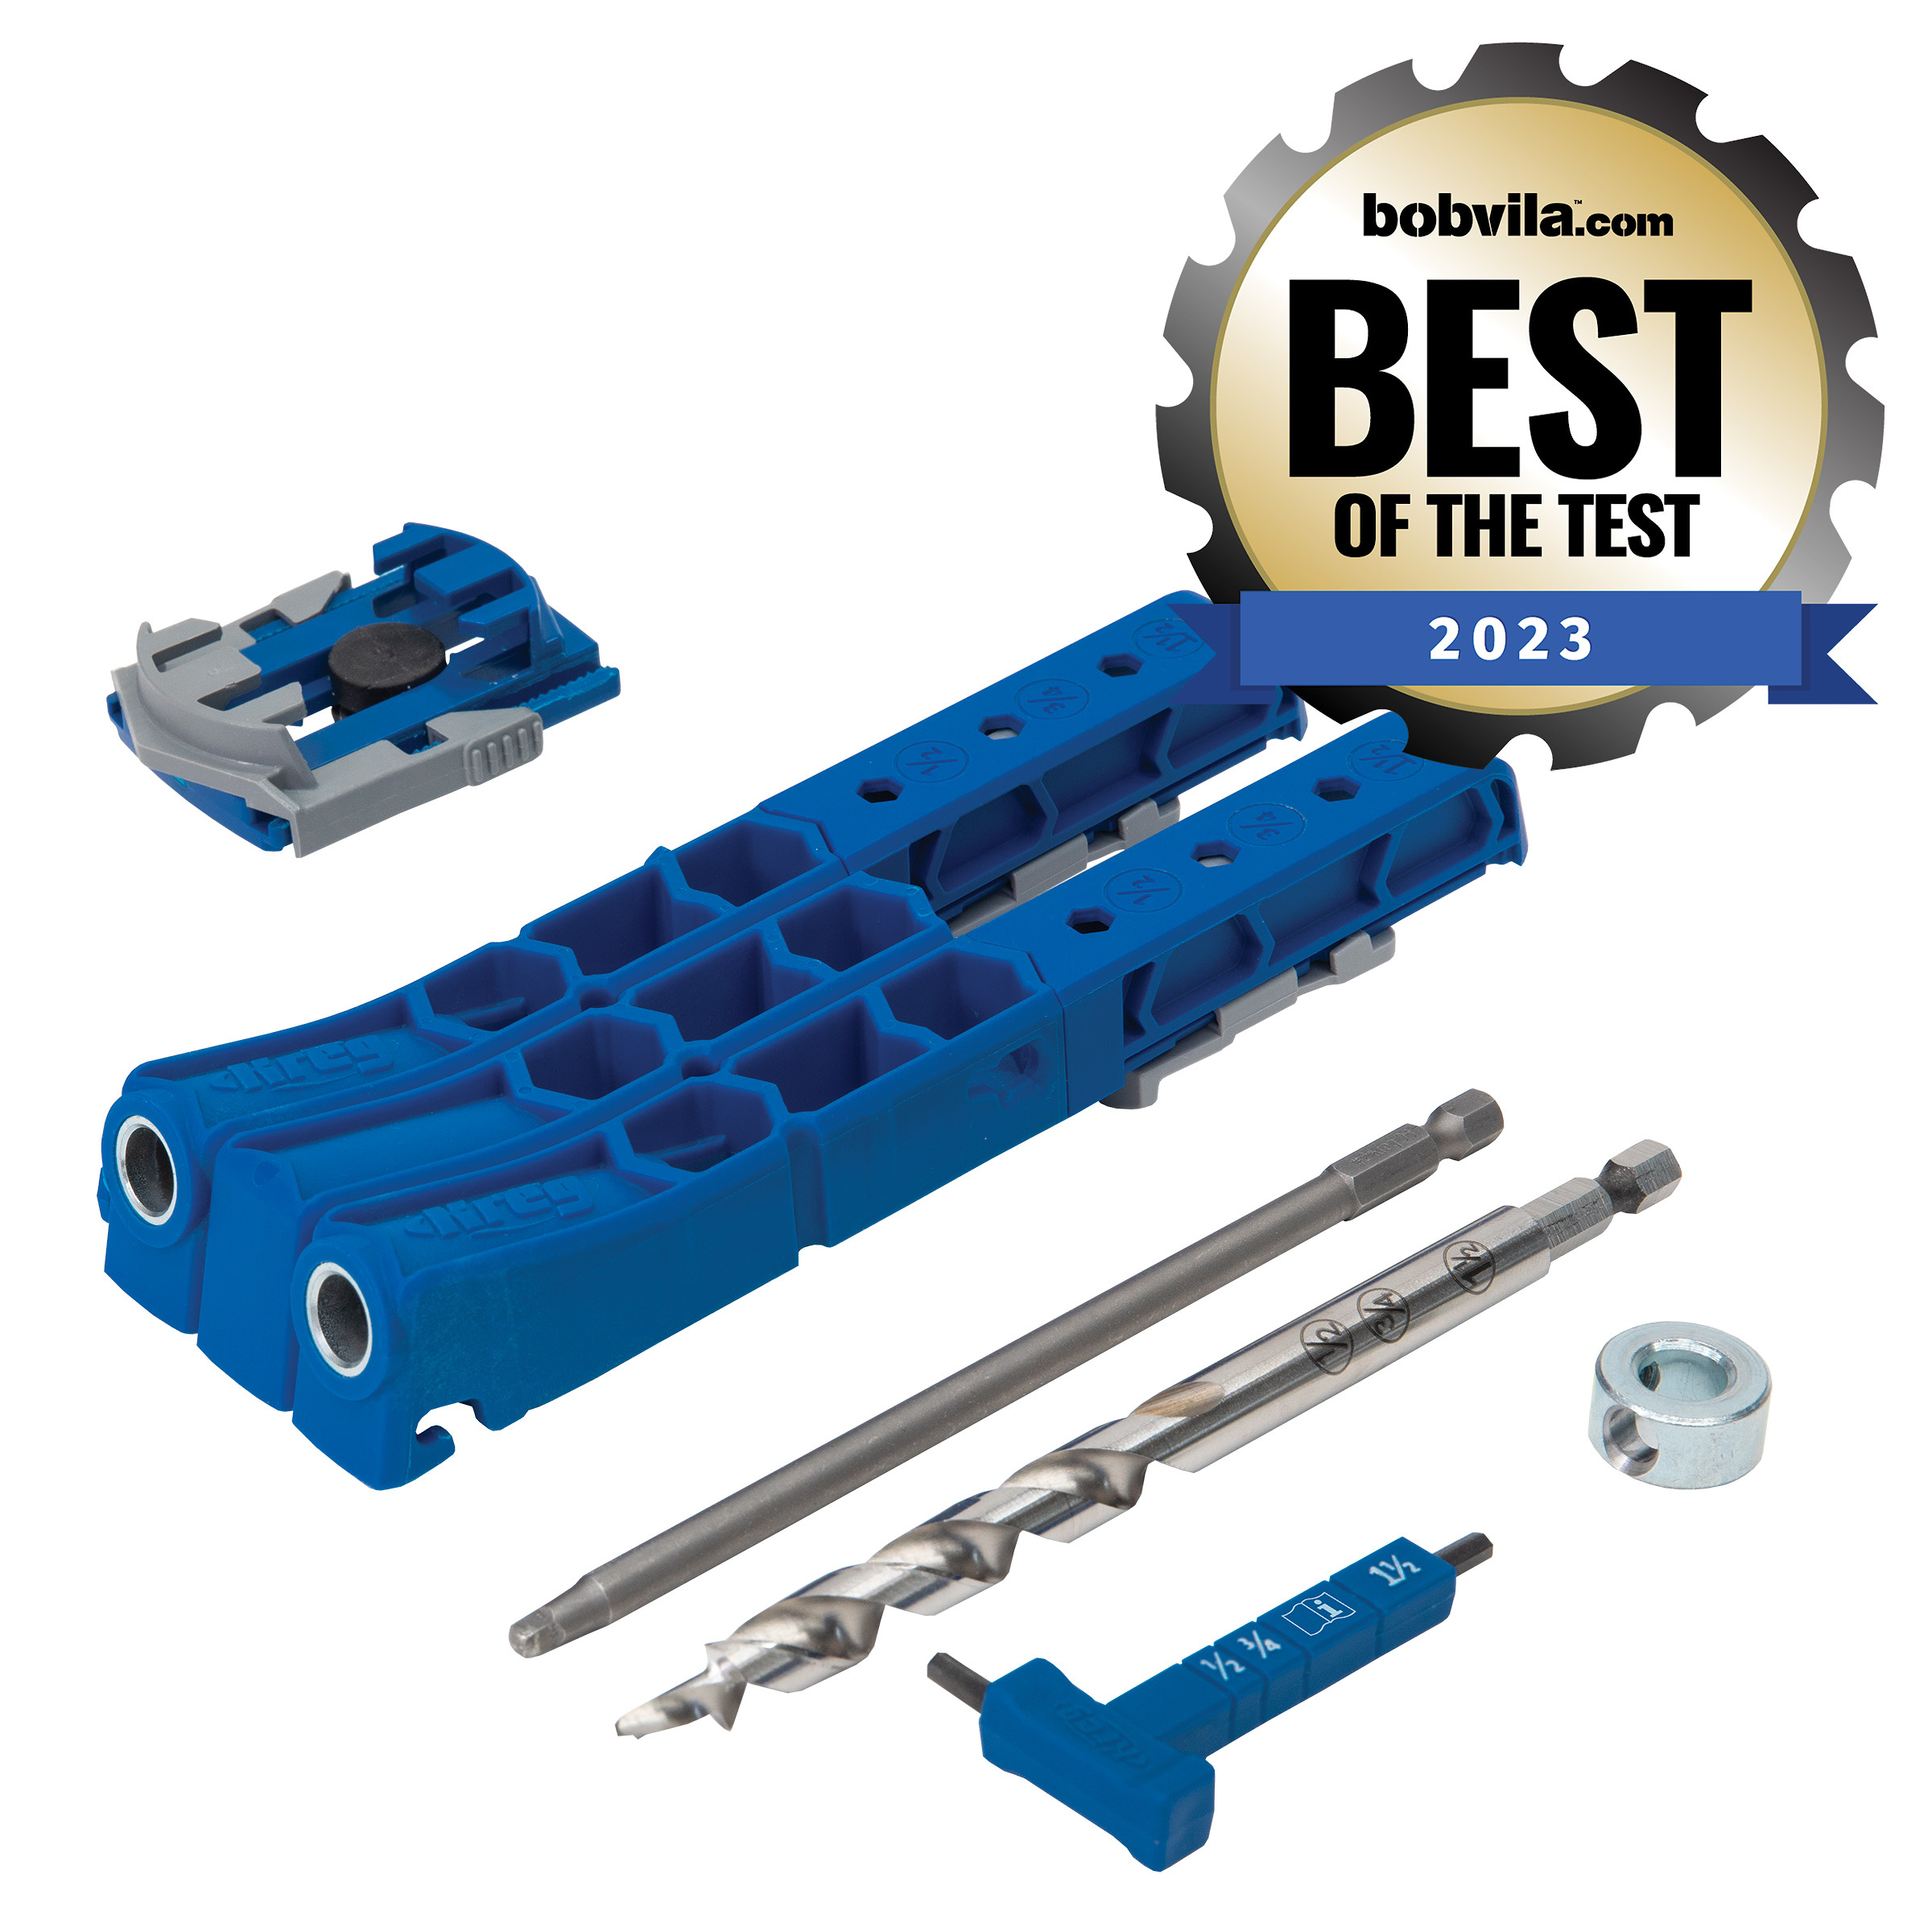
Kreg Tools
Other Tools
-
drill driver

-
circular saw
-
miter saw
-
1 1/2" hole saw
-
tape measure
-
sander
Materials
Wood Products
- 4 Board , 1x2 x 96"
- 1 Board , 2x2 x 96"
- 2 Board , 1x6 x 96"
- 1 Board , 1x6 x 72"
- 2 Board , 1x8 x 96"
- 1 Plywood , 3/4" x 24" x 48"
- 1 Plywood , 1/4" x 24" x 24"
Hardware & Supplies
- 100 1 1/4" coarse-thread Kreg Pocket-Hole Screws
- 20 1-1/4" 18-gauge brad nails
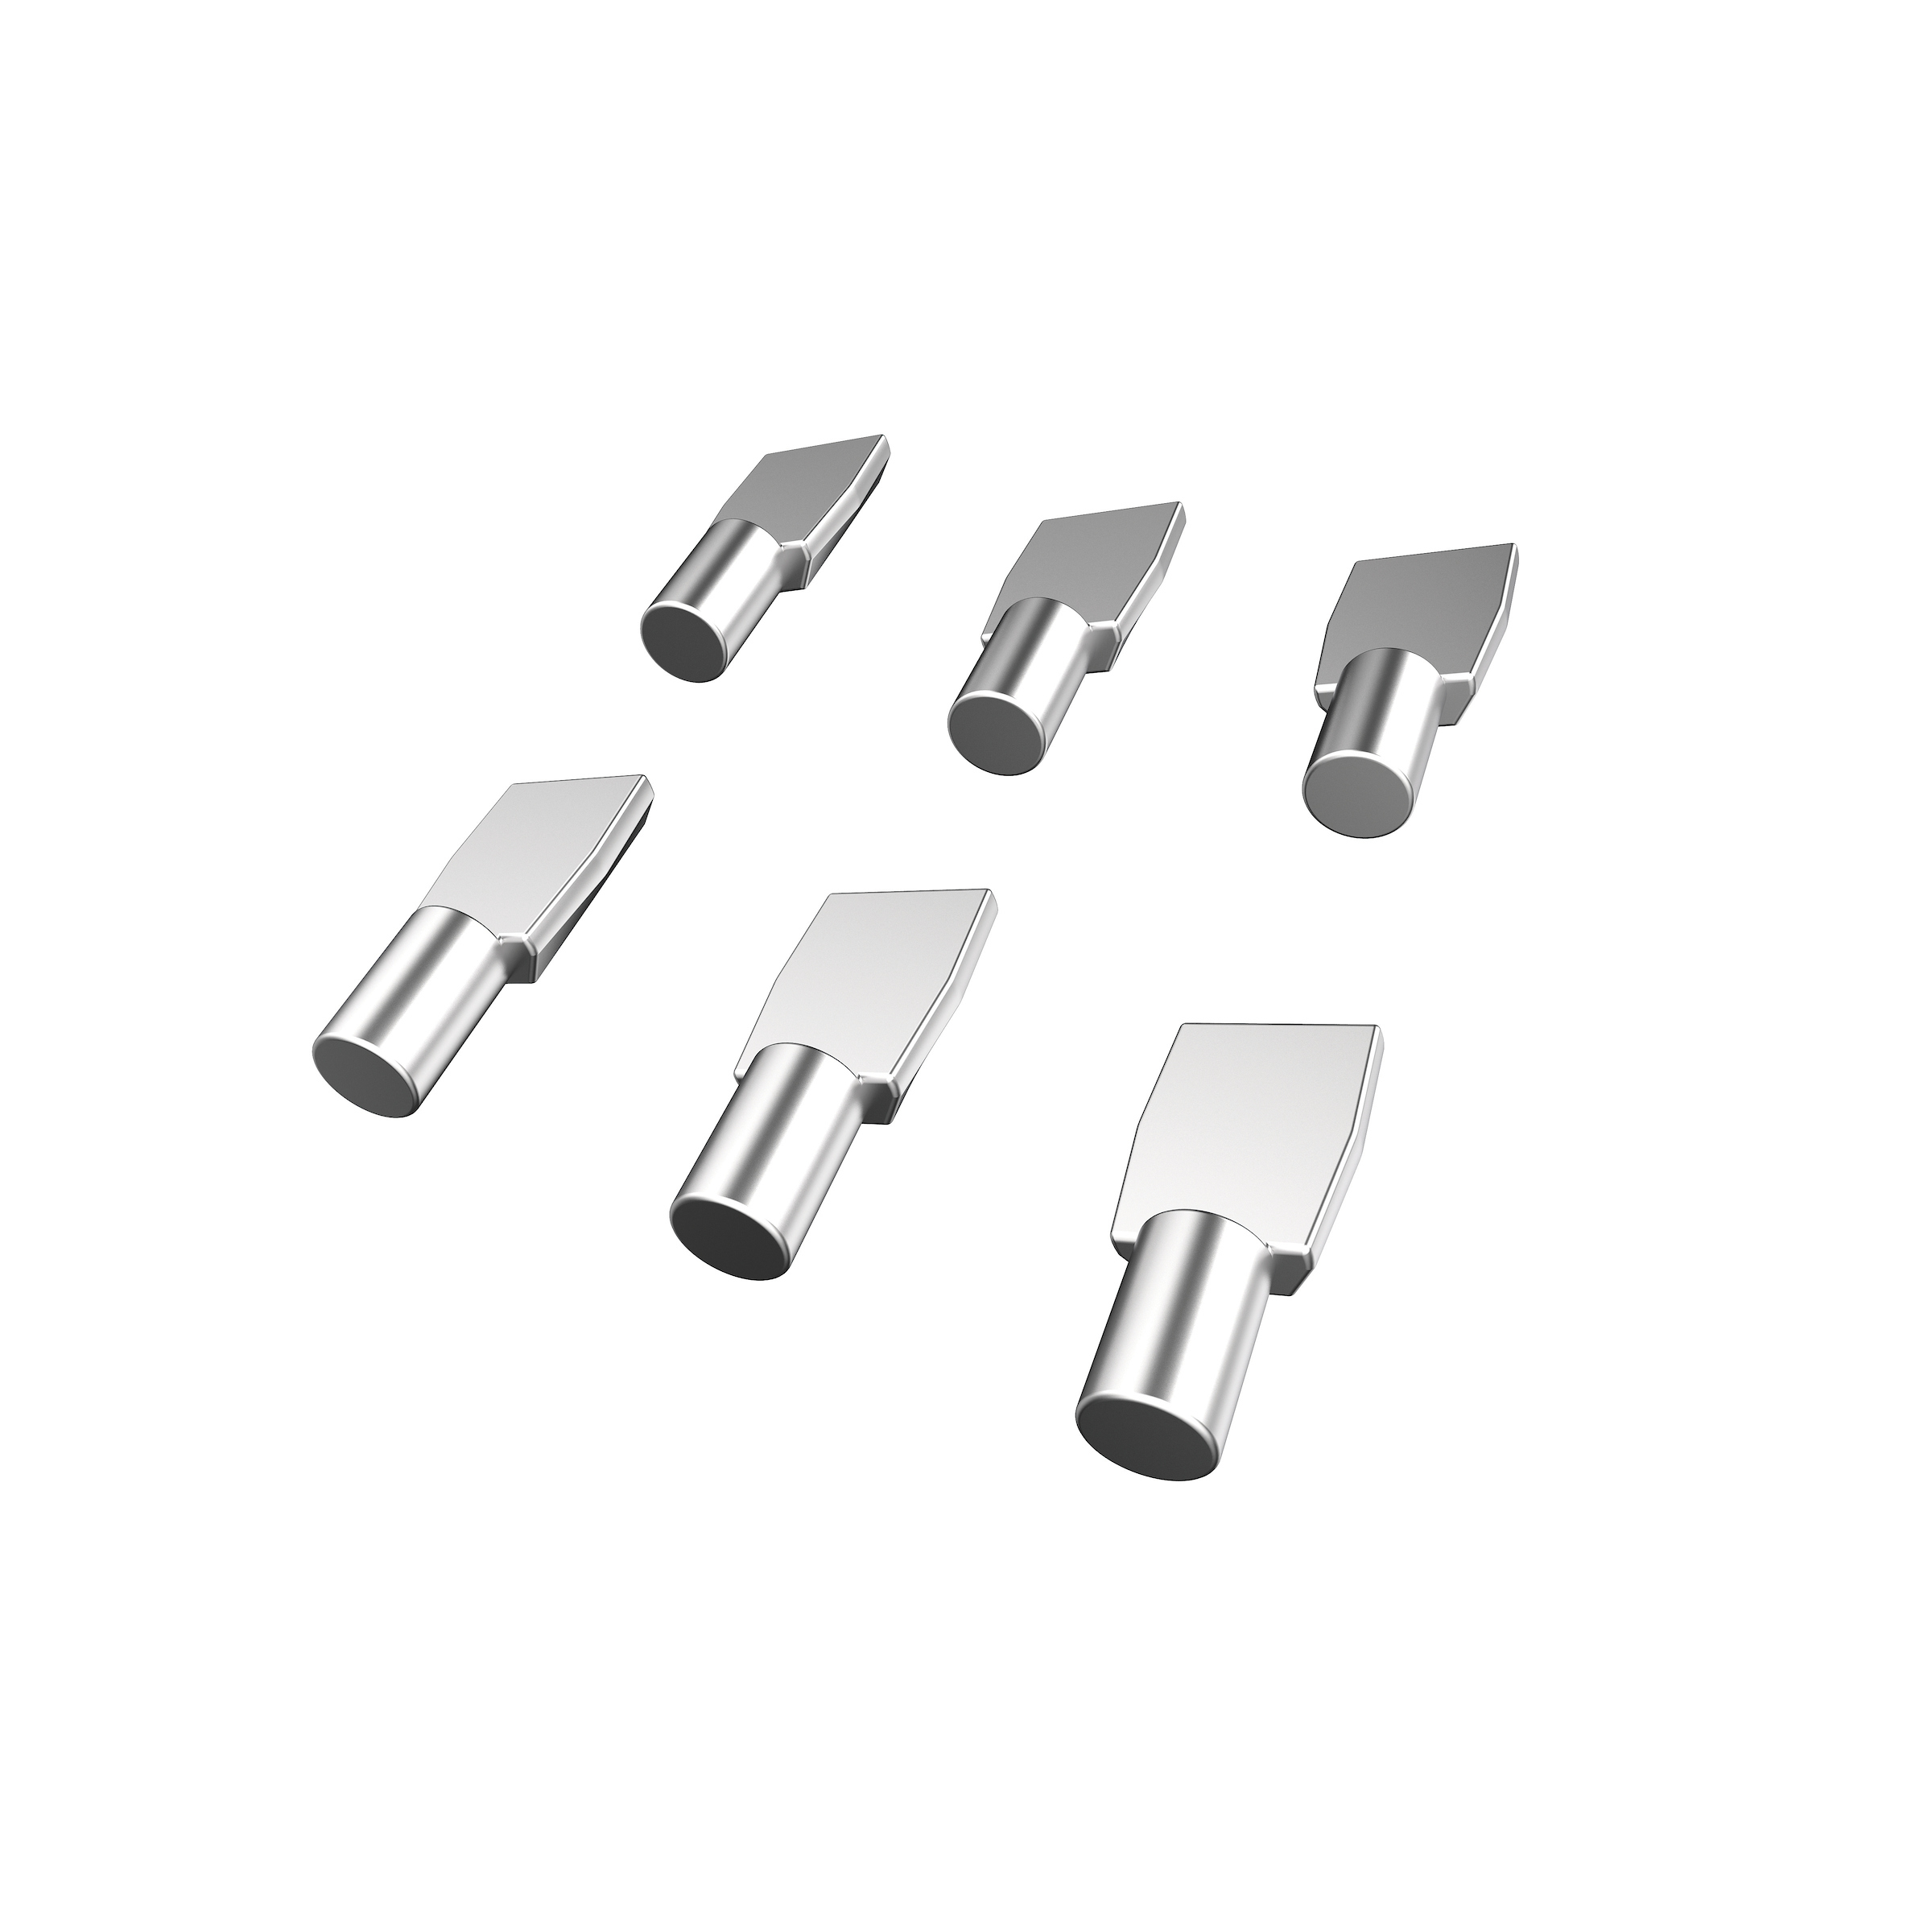
- 8 1/4" shelf pins
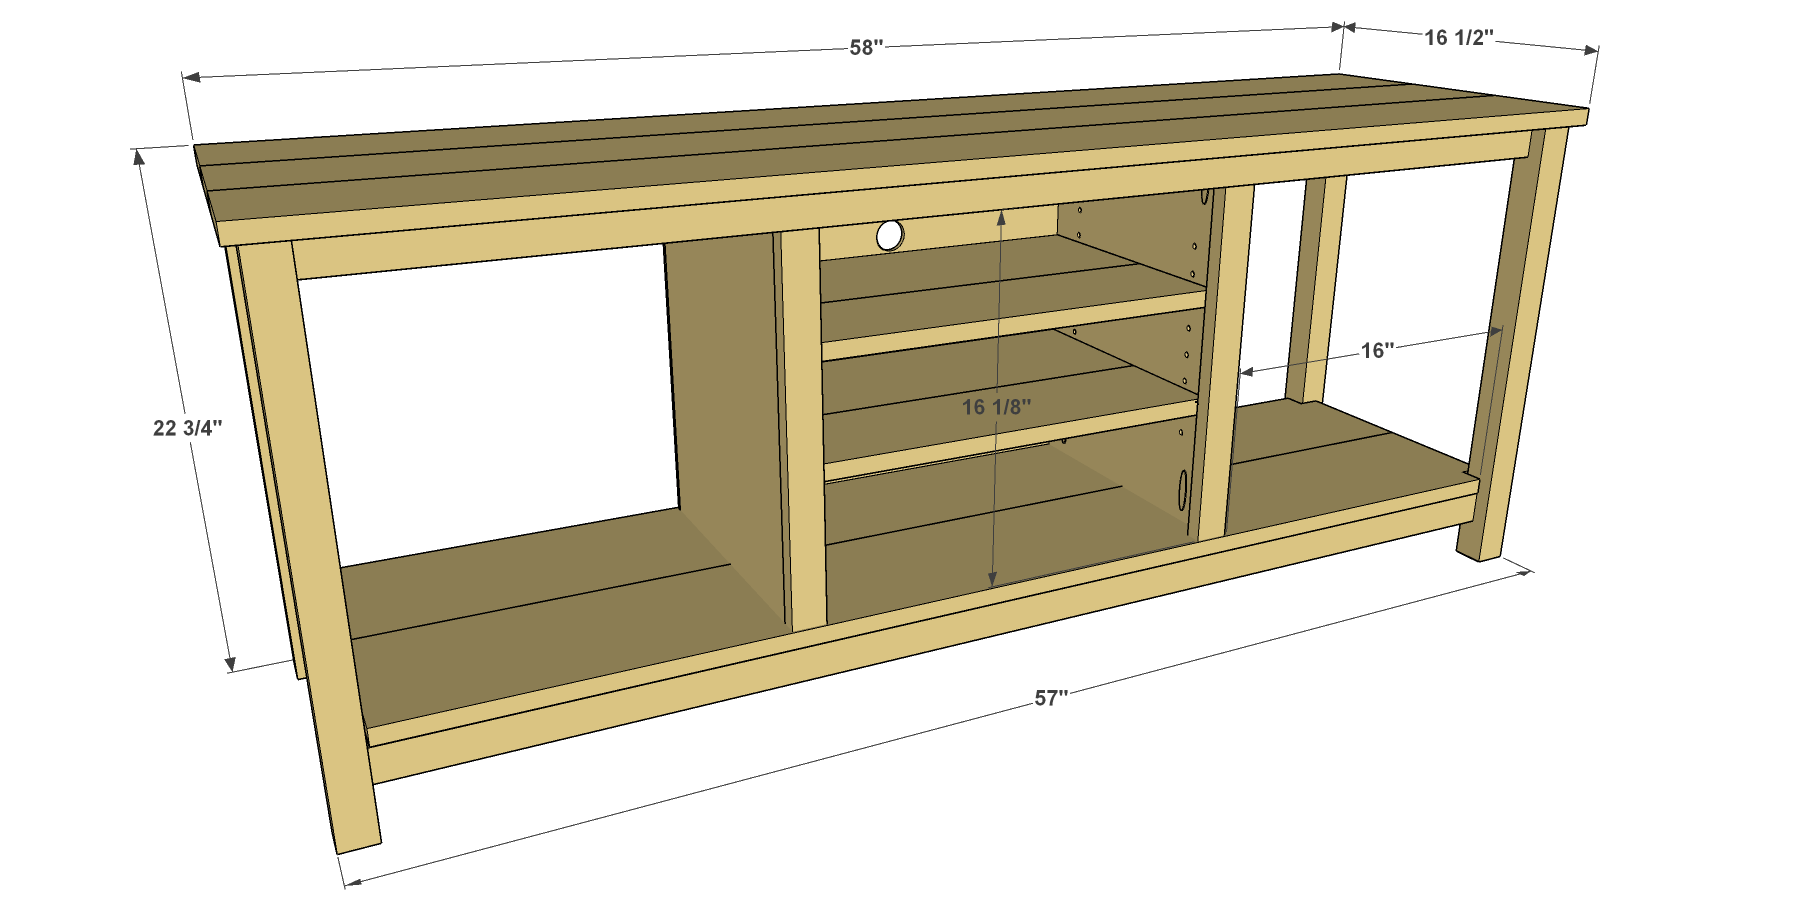
Cut List & Parts
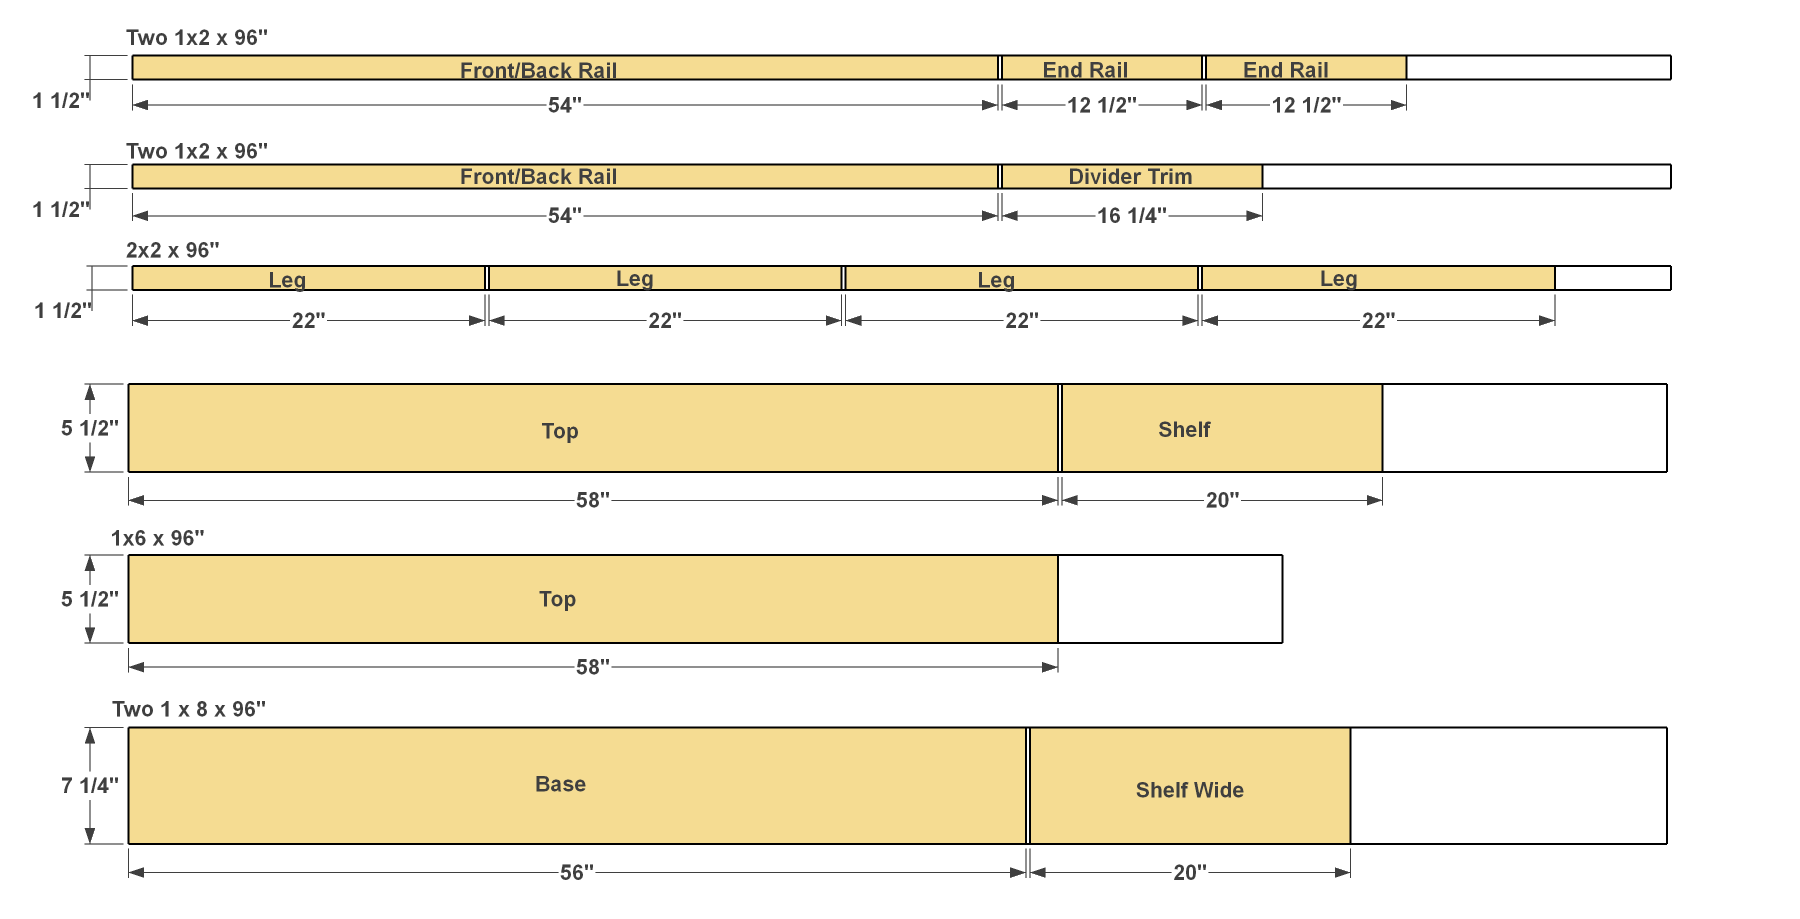
- 4 Front/Back Rail , 3/4" x 1 1/2" x 54"
- 4 End Rail , 3/4" x 1 1/2" x 12 1/2"
- 4 Leg , 1 1/2" x 1 1/2" x 22"
- 3 Top Slat , 3/4" x 5 1/2" x 58"
- 2 Base S;at , 3/4" x 7 1/4" x 56"
- 2 Wide Shelf Slat , 3/4" x 7 1/4" x 20"
- 2 Narrow Shelf Slat , 3/4" x 5 1/2" x 20"
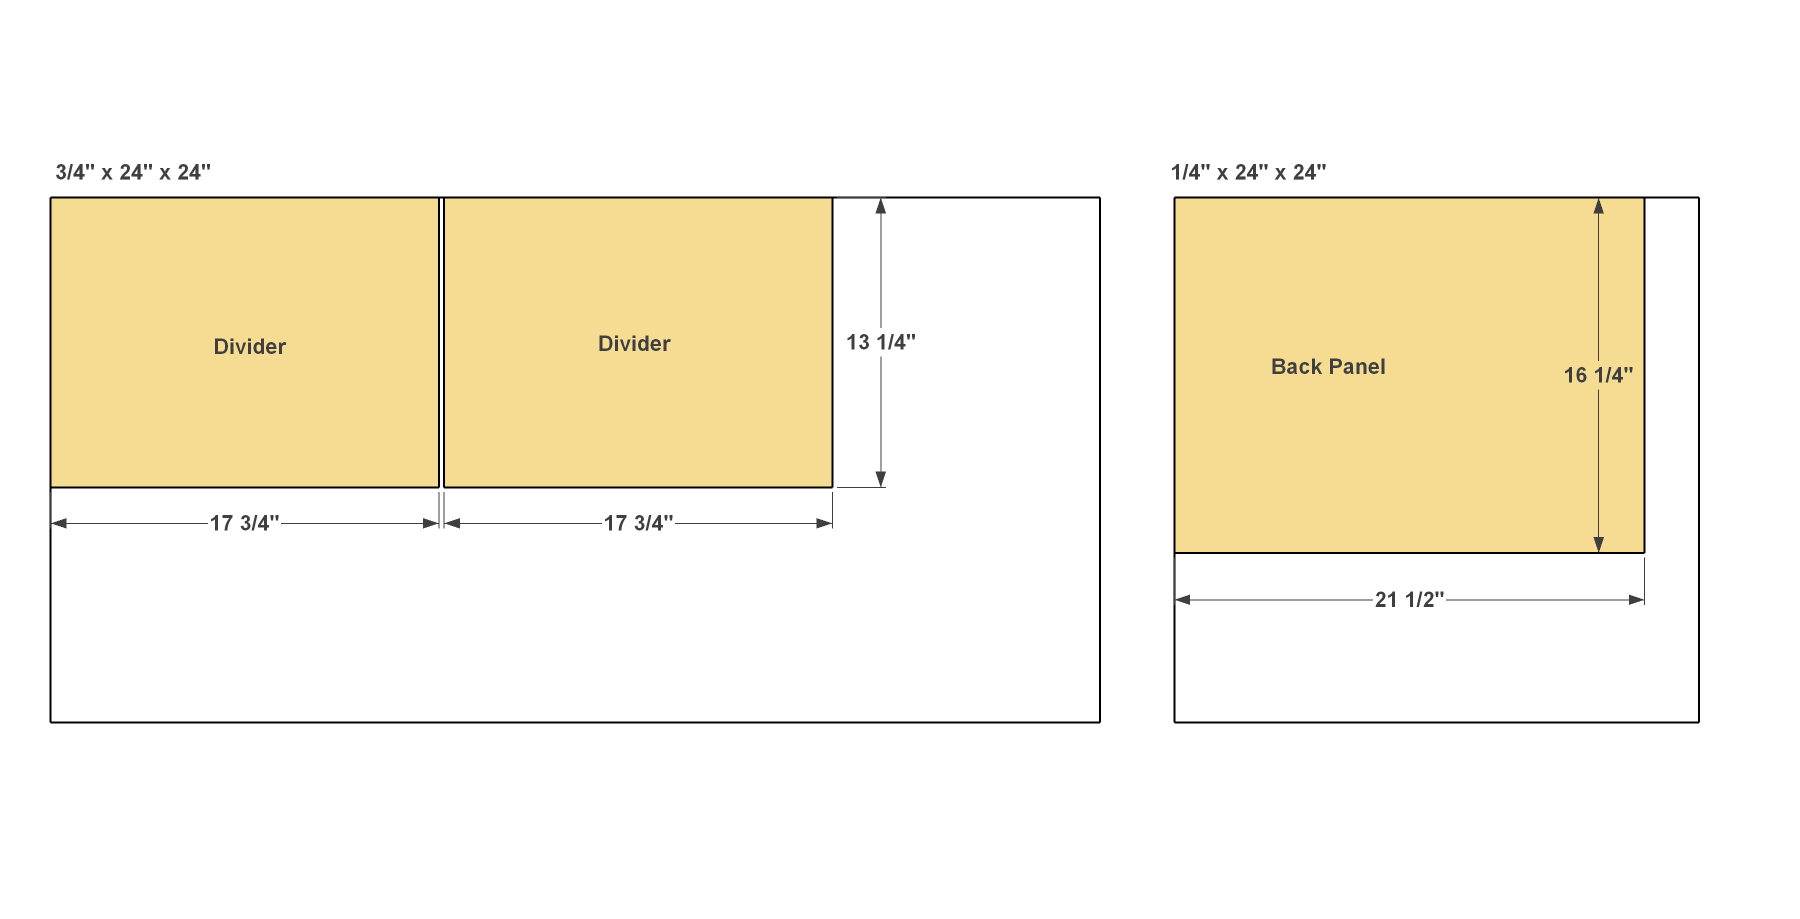
- 2 Divider , 3/4" x 13 1/4" x 17 3/4"
- 2 Divider Trim , 3/4" x 1 1/2" x 16 1/4"
- 1 Back Panel , 1/4" x 21 1/2" x 16 1/4"
Directions
-
Make the Rails
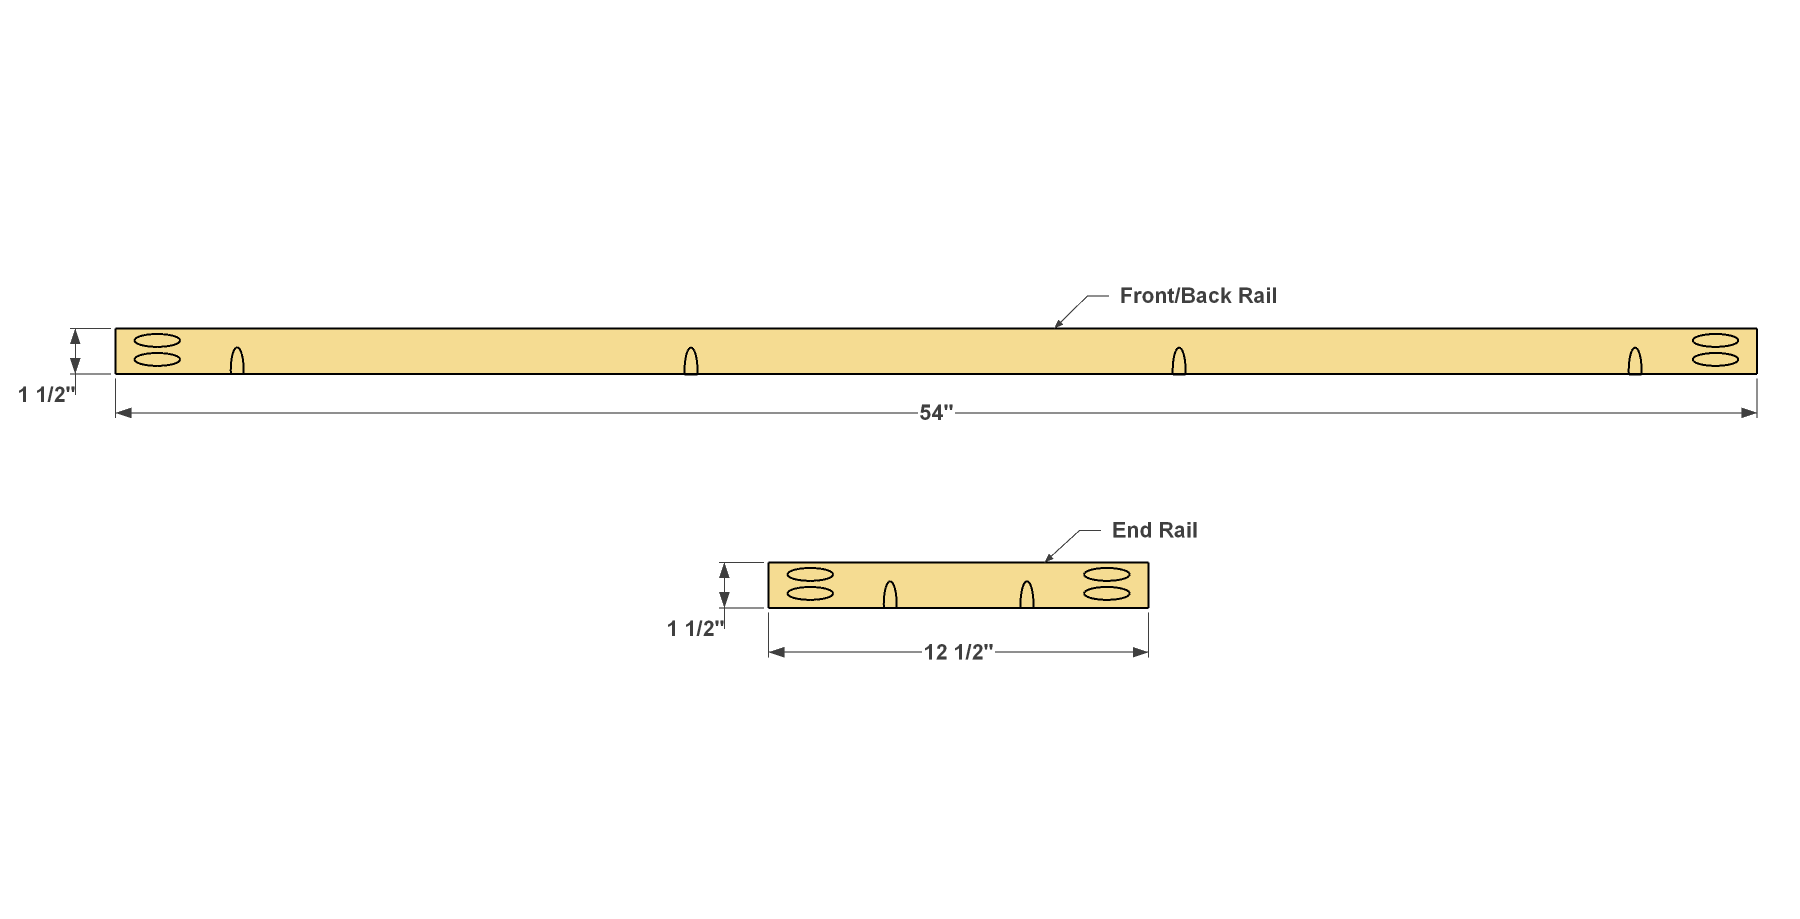
Cut four Front/Back Rails and four End Rails to length from 1x2 boards, as shown in the cutting diagram. With your Kreg® Pocket-Hole Jig set up for 3/4"-thick material, drill pocket in these Rails holes where shown. Sand the Rails smooth.
-
Cut Legs and Assemble
Cut four Legs to length from a 2x2 board, as shown in the cutting diagram. Then, attach the Rails to the Legs, as shown, using 1 1/4" coarse-thread Kreg Pocket-Hole Screws.

-
Create the Top Slats
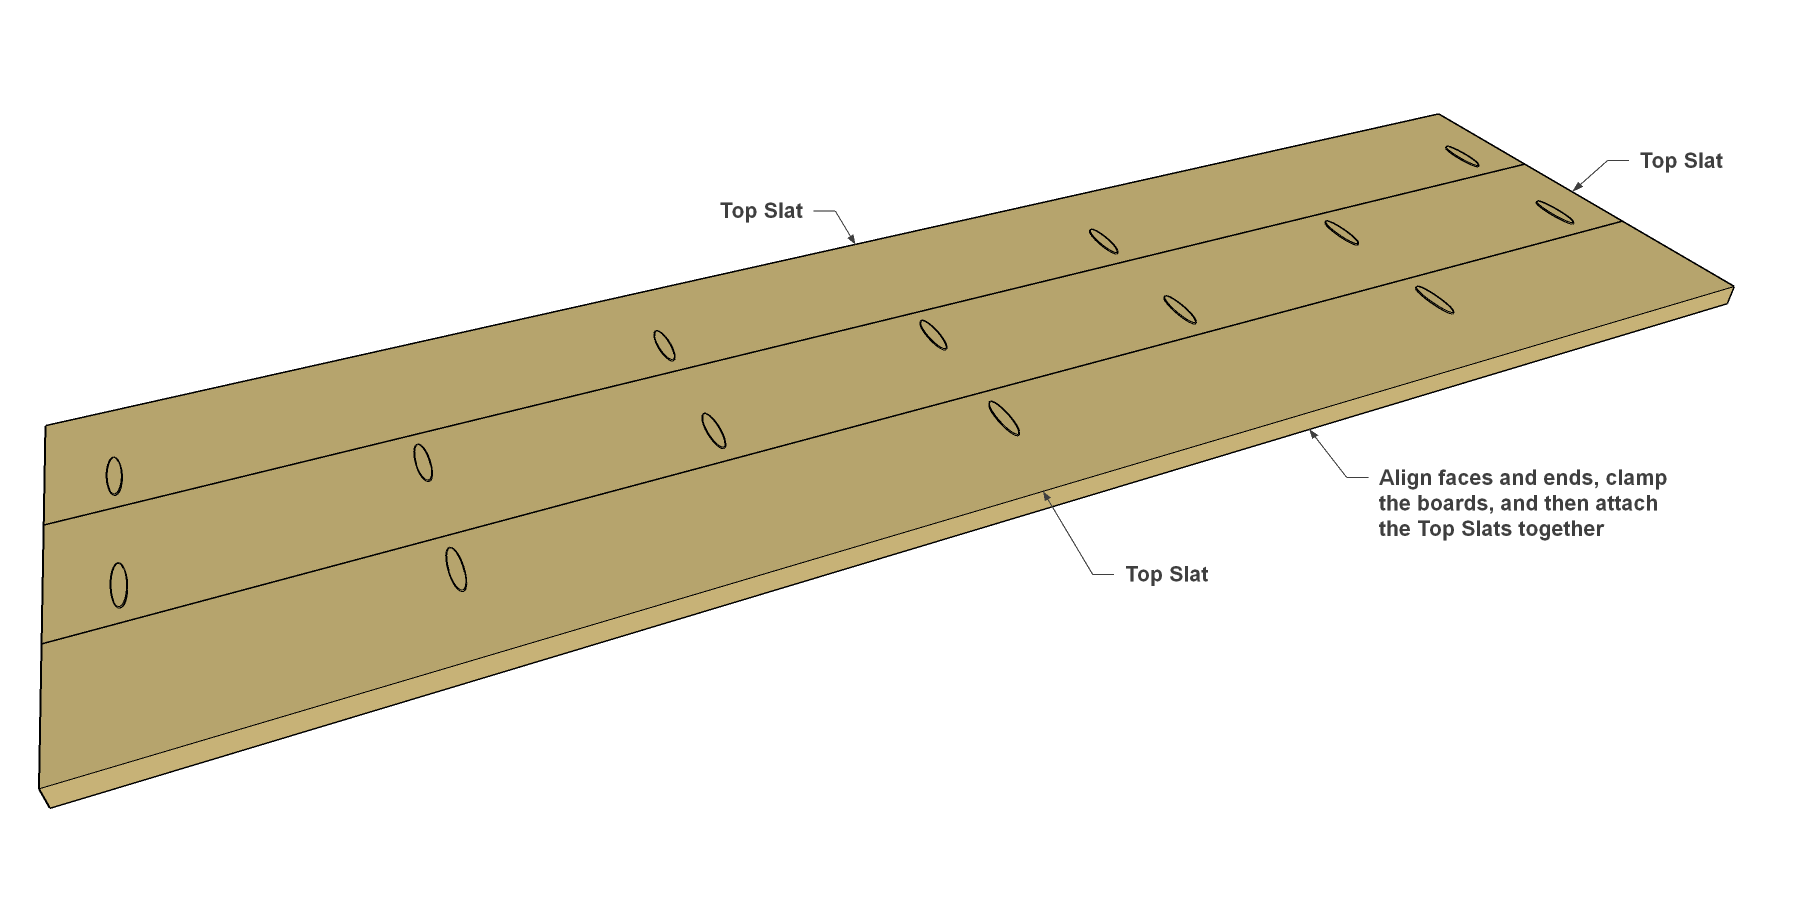
Cut three Top Slats to length from 1x6 boards, as shown in the cutting diagram. Drill pocket holes in these pieces, as shown.

-
Assemble the Top
Join the Top boards together using 1 1/4" coarse-thread Kreg Pocket-Hole Screws to create a panel, as shown. Sand the top assembly as needed to smooth out the wood and the joints between the Slats.
-
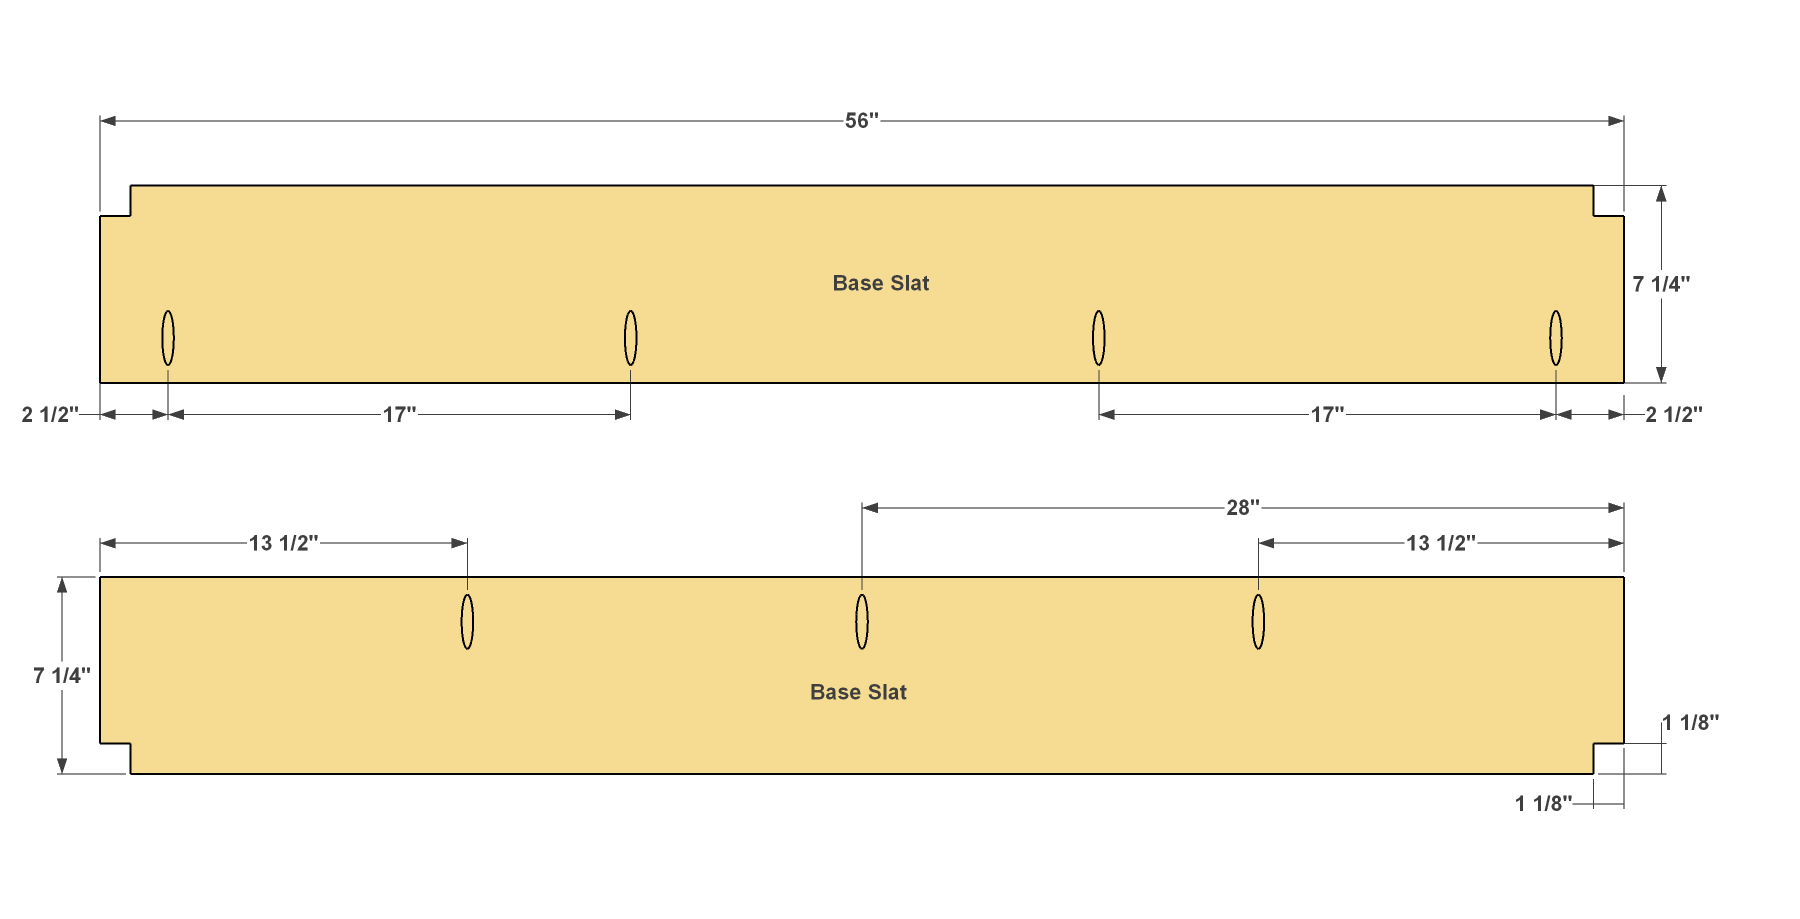
Create the Base Slats
Cut two Base Slats to length from 1x8 boards, as shown in the cutting diagram. With your pocket hole jig set up for 3/4" material, drill pocket holes in these pieces, as shown. Using a jig saw, notch two corners of each Base Slats, as well.
-
Assemble the Base
Join the Base boards together using 1 1/4" coarse-thread Kreg Pocket-Hole Screws to create a panel, as shown. Sand the base assembly as needed to smooth out the wood and the joints between the Slats.

-
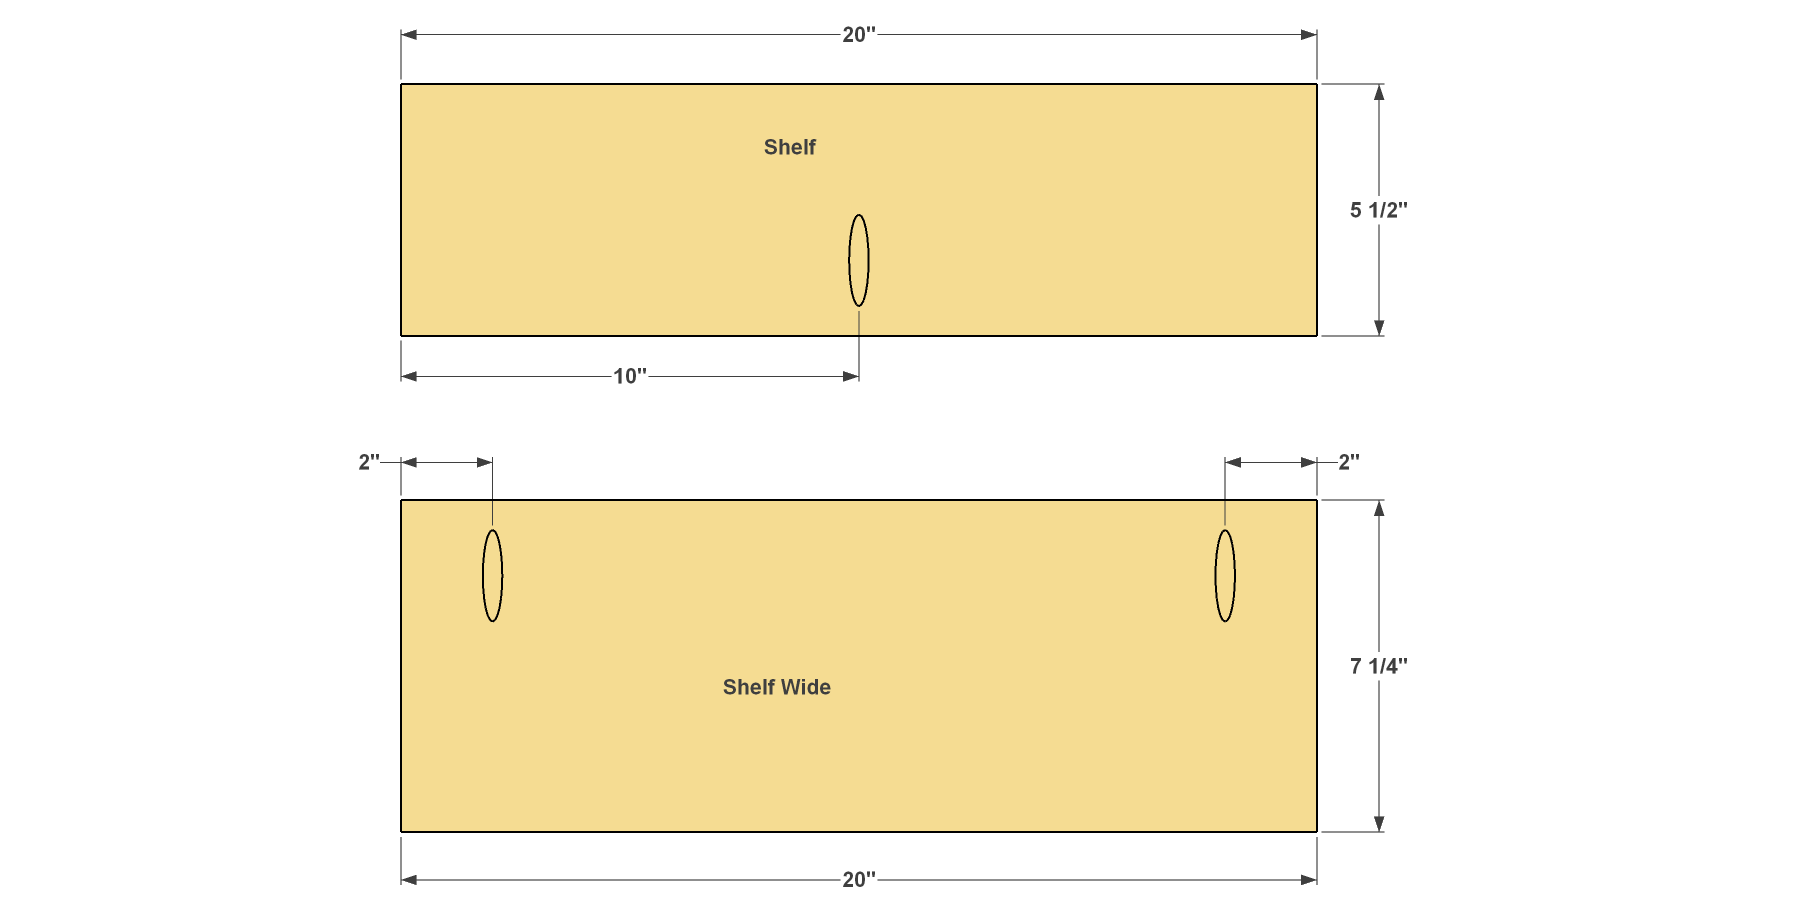
Make the Shelves
Cut two Wide Shelf Slats to length from 1x8 boards, and cut two Narrow Shelf Slats to length from 1x6 boards, as shown in the cutting diagram. Then pair up a Narrow and Wide Slat to make each shelf, and drill pocket holes as shown.
-
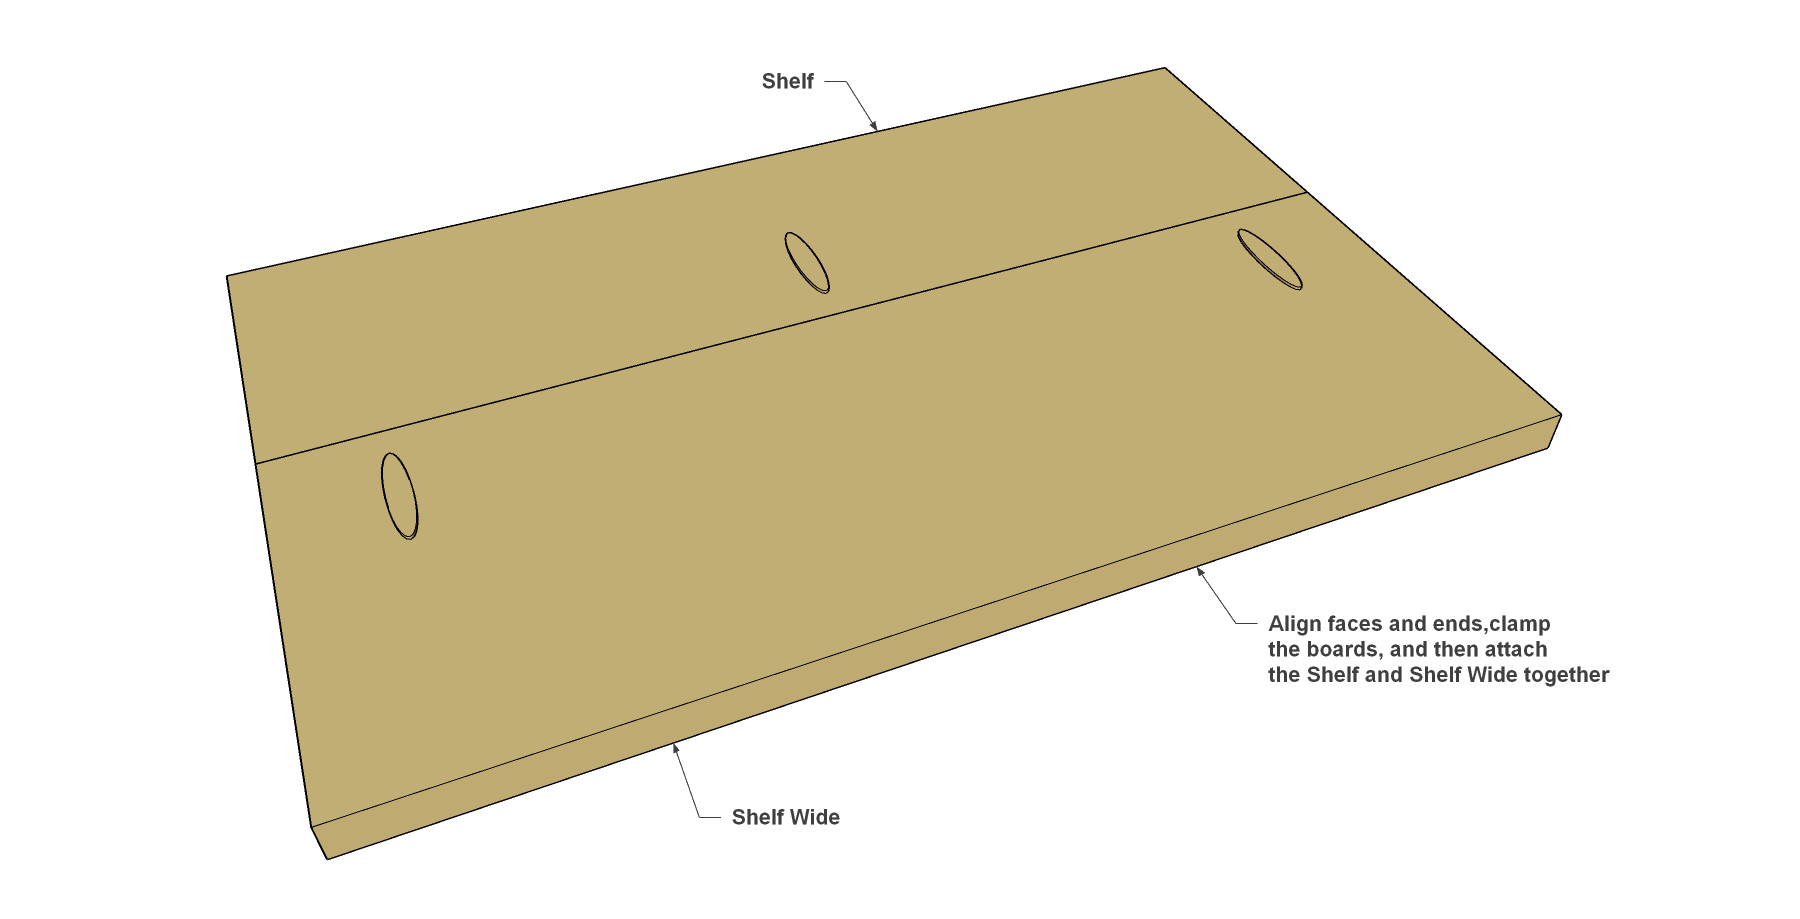
Assemble the Shelves
Join a Narrow Shelf Slat to a Wide Shelf Slat using 1 1/4" coarse-thread Kreg Pocket-Hole Screws to create a panel, as shown. Repeat this to make the other shelf assembly. Sand each shelf assembly.
-
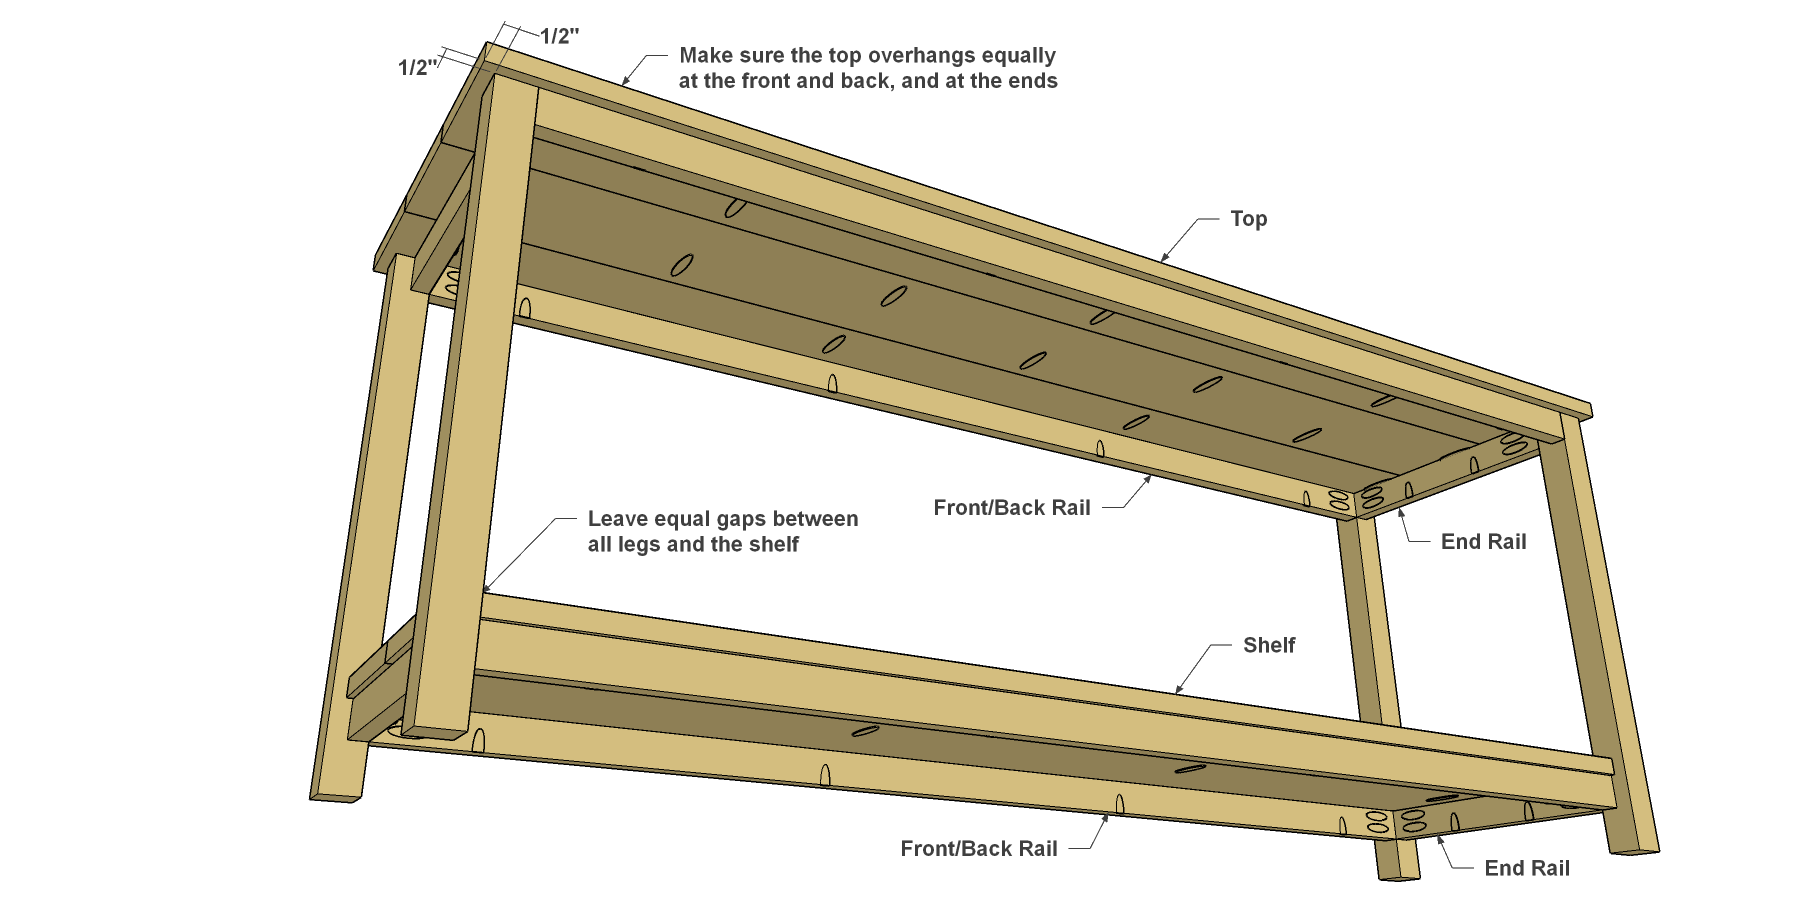
Install the Top and Base
Attach the Top and Base to the stand by driving 1-1/4" coarse-thread Kreg Pocket-Hole Screws into them from underneath. When attaching the Top, make sure it overhangs the stand equally on all sides. Make sure the Base has consistent gaps around the legs.
-
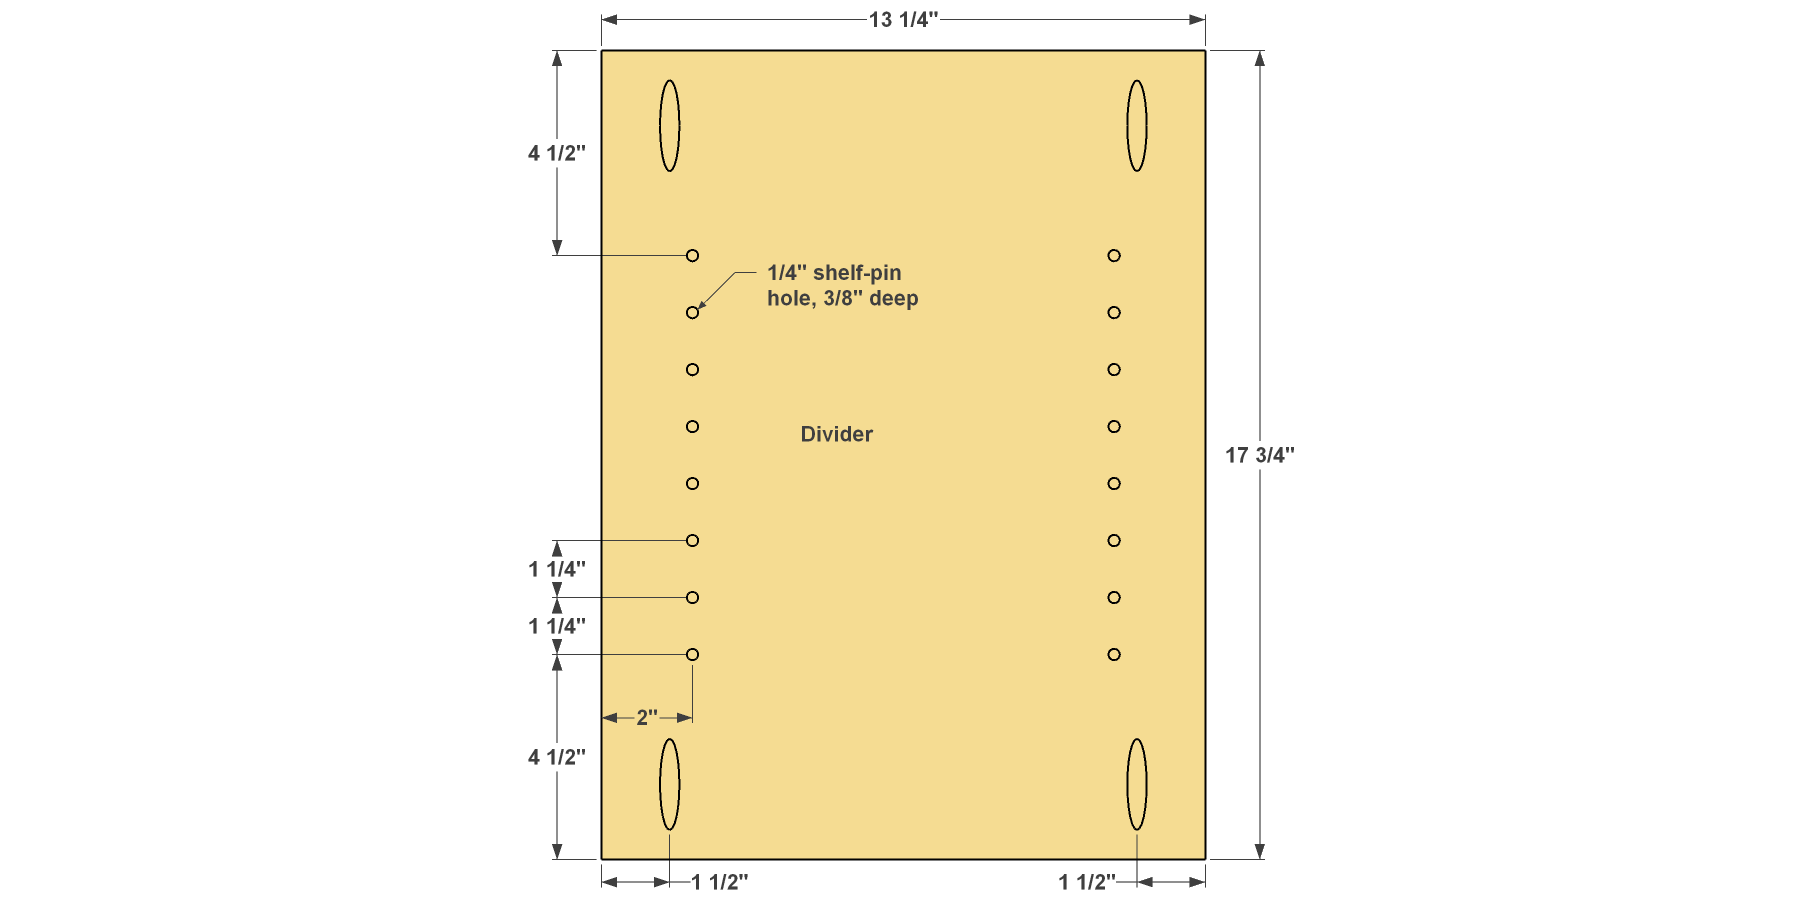
Make the Dividers
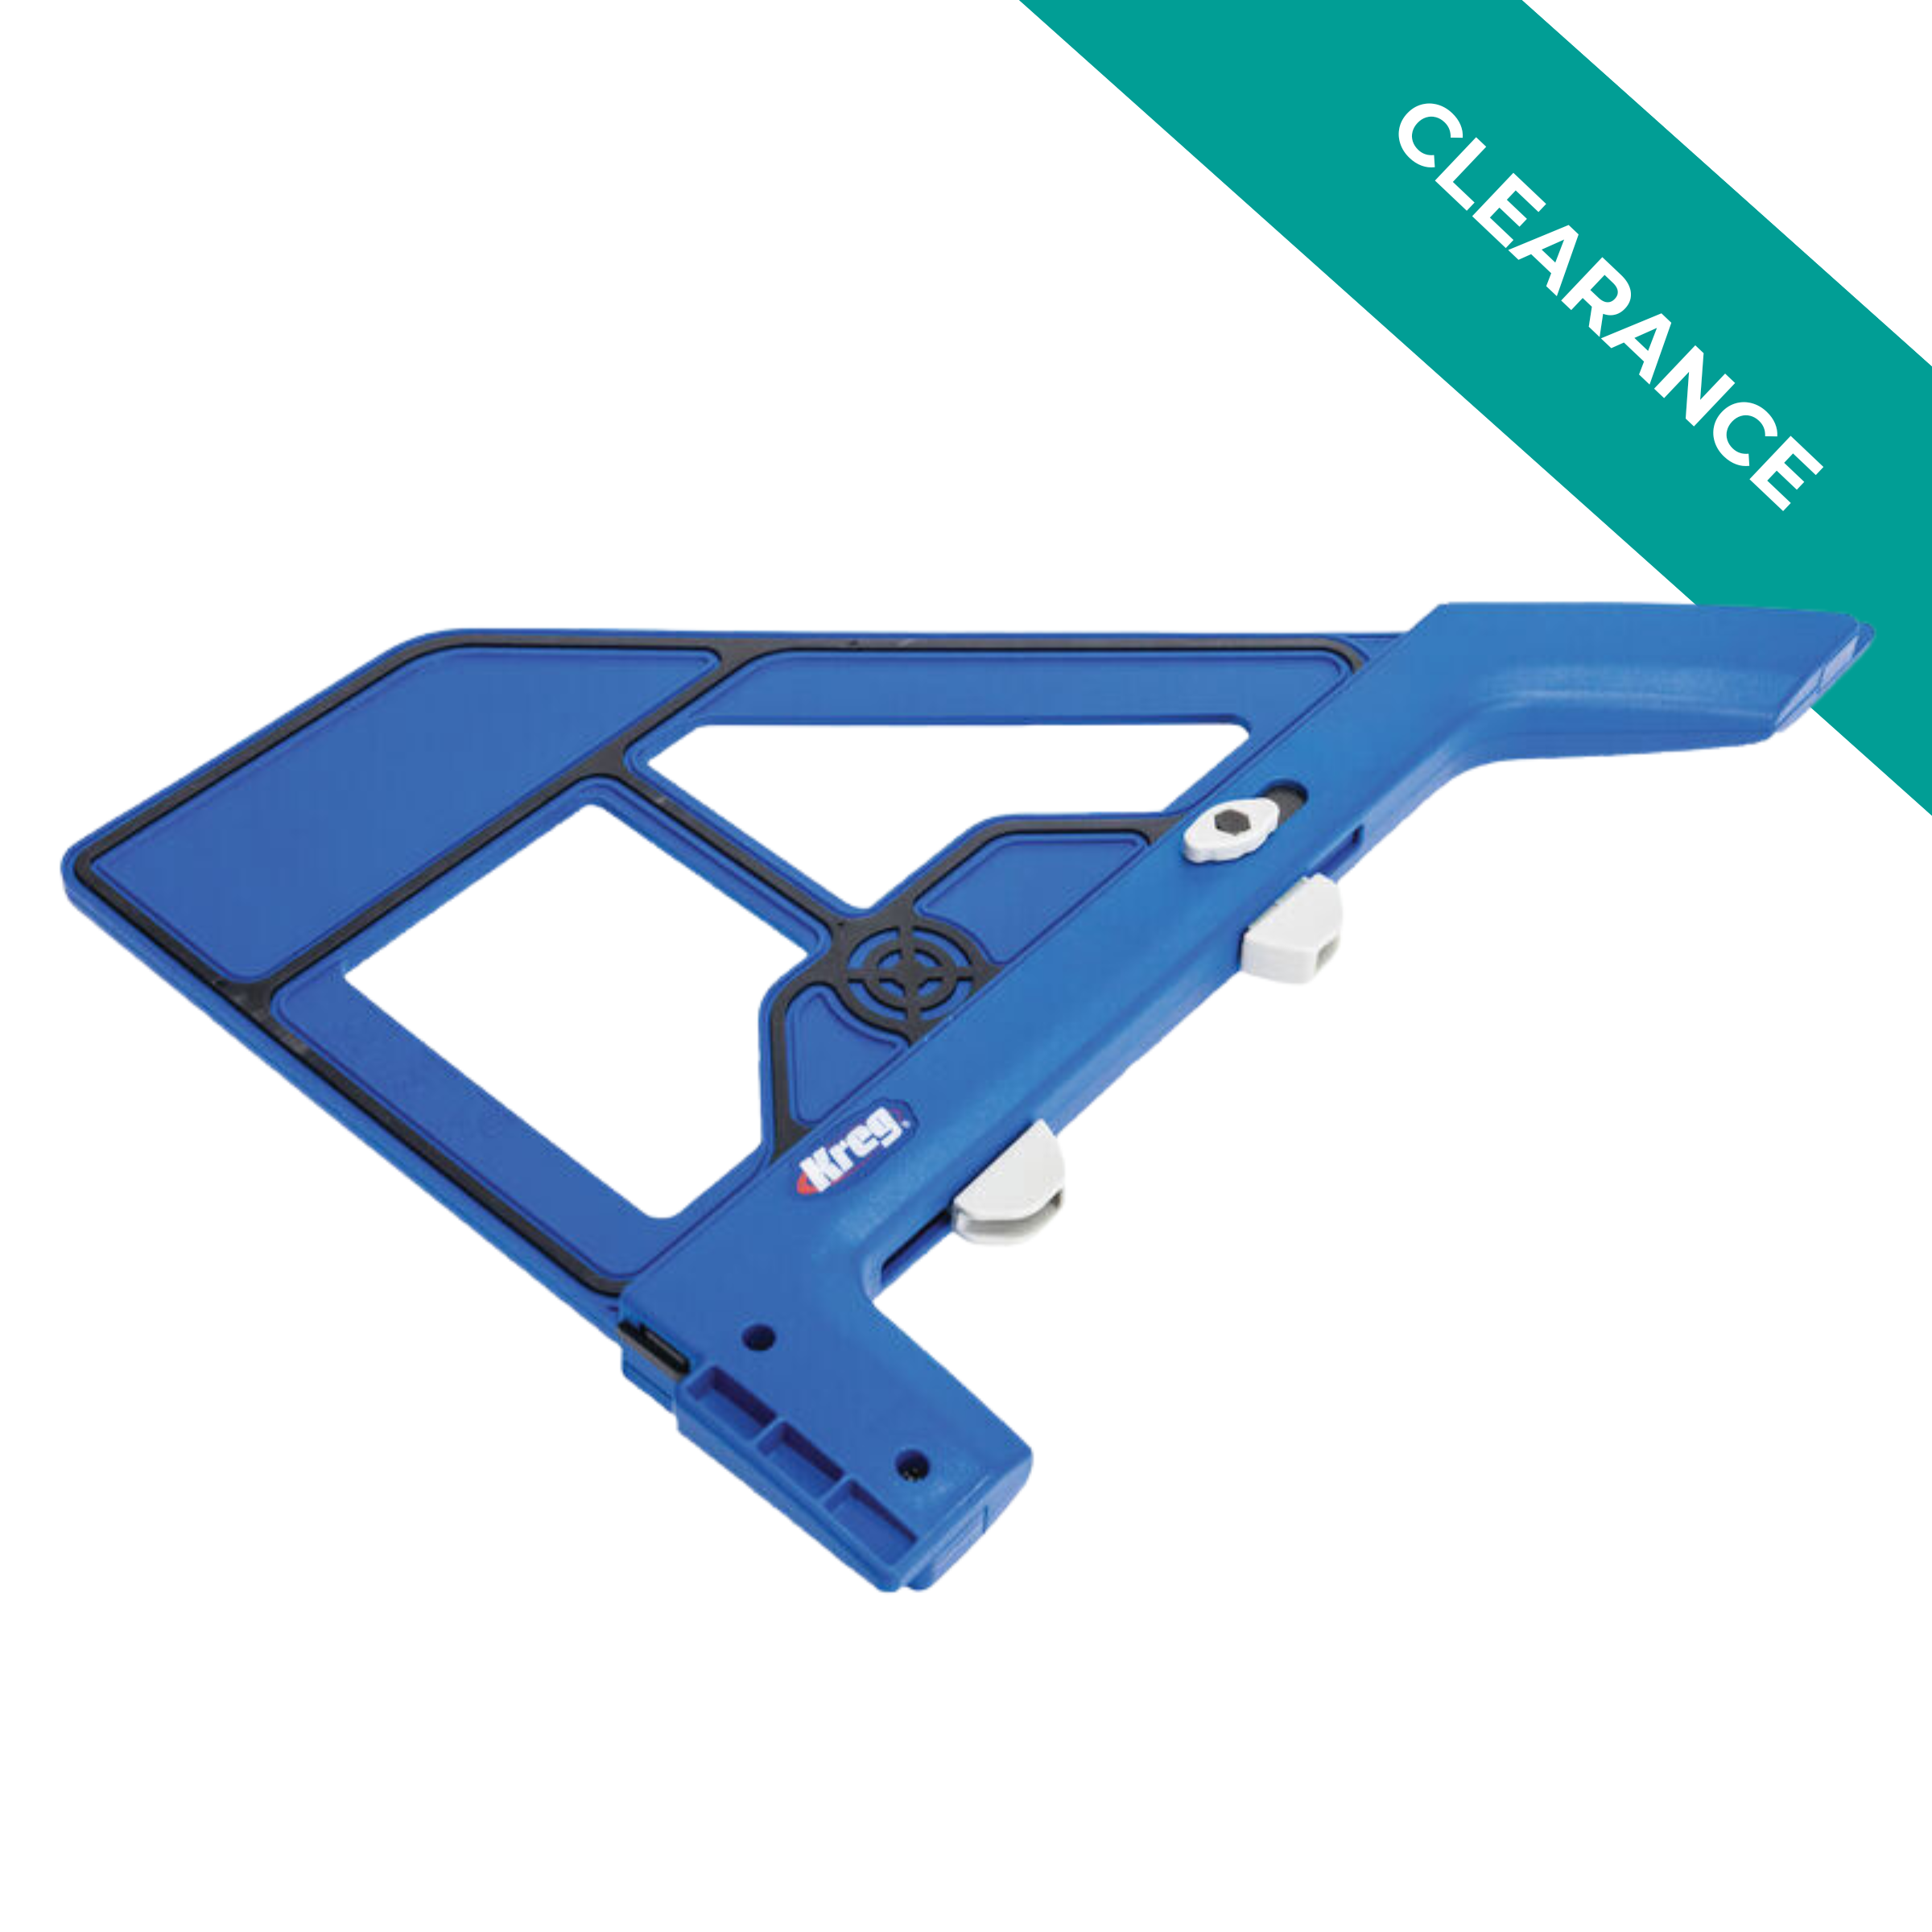
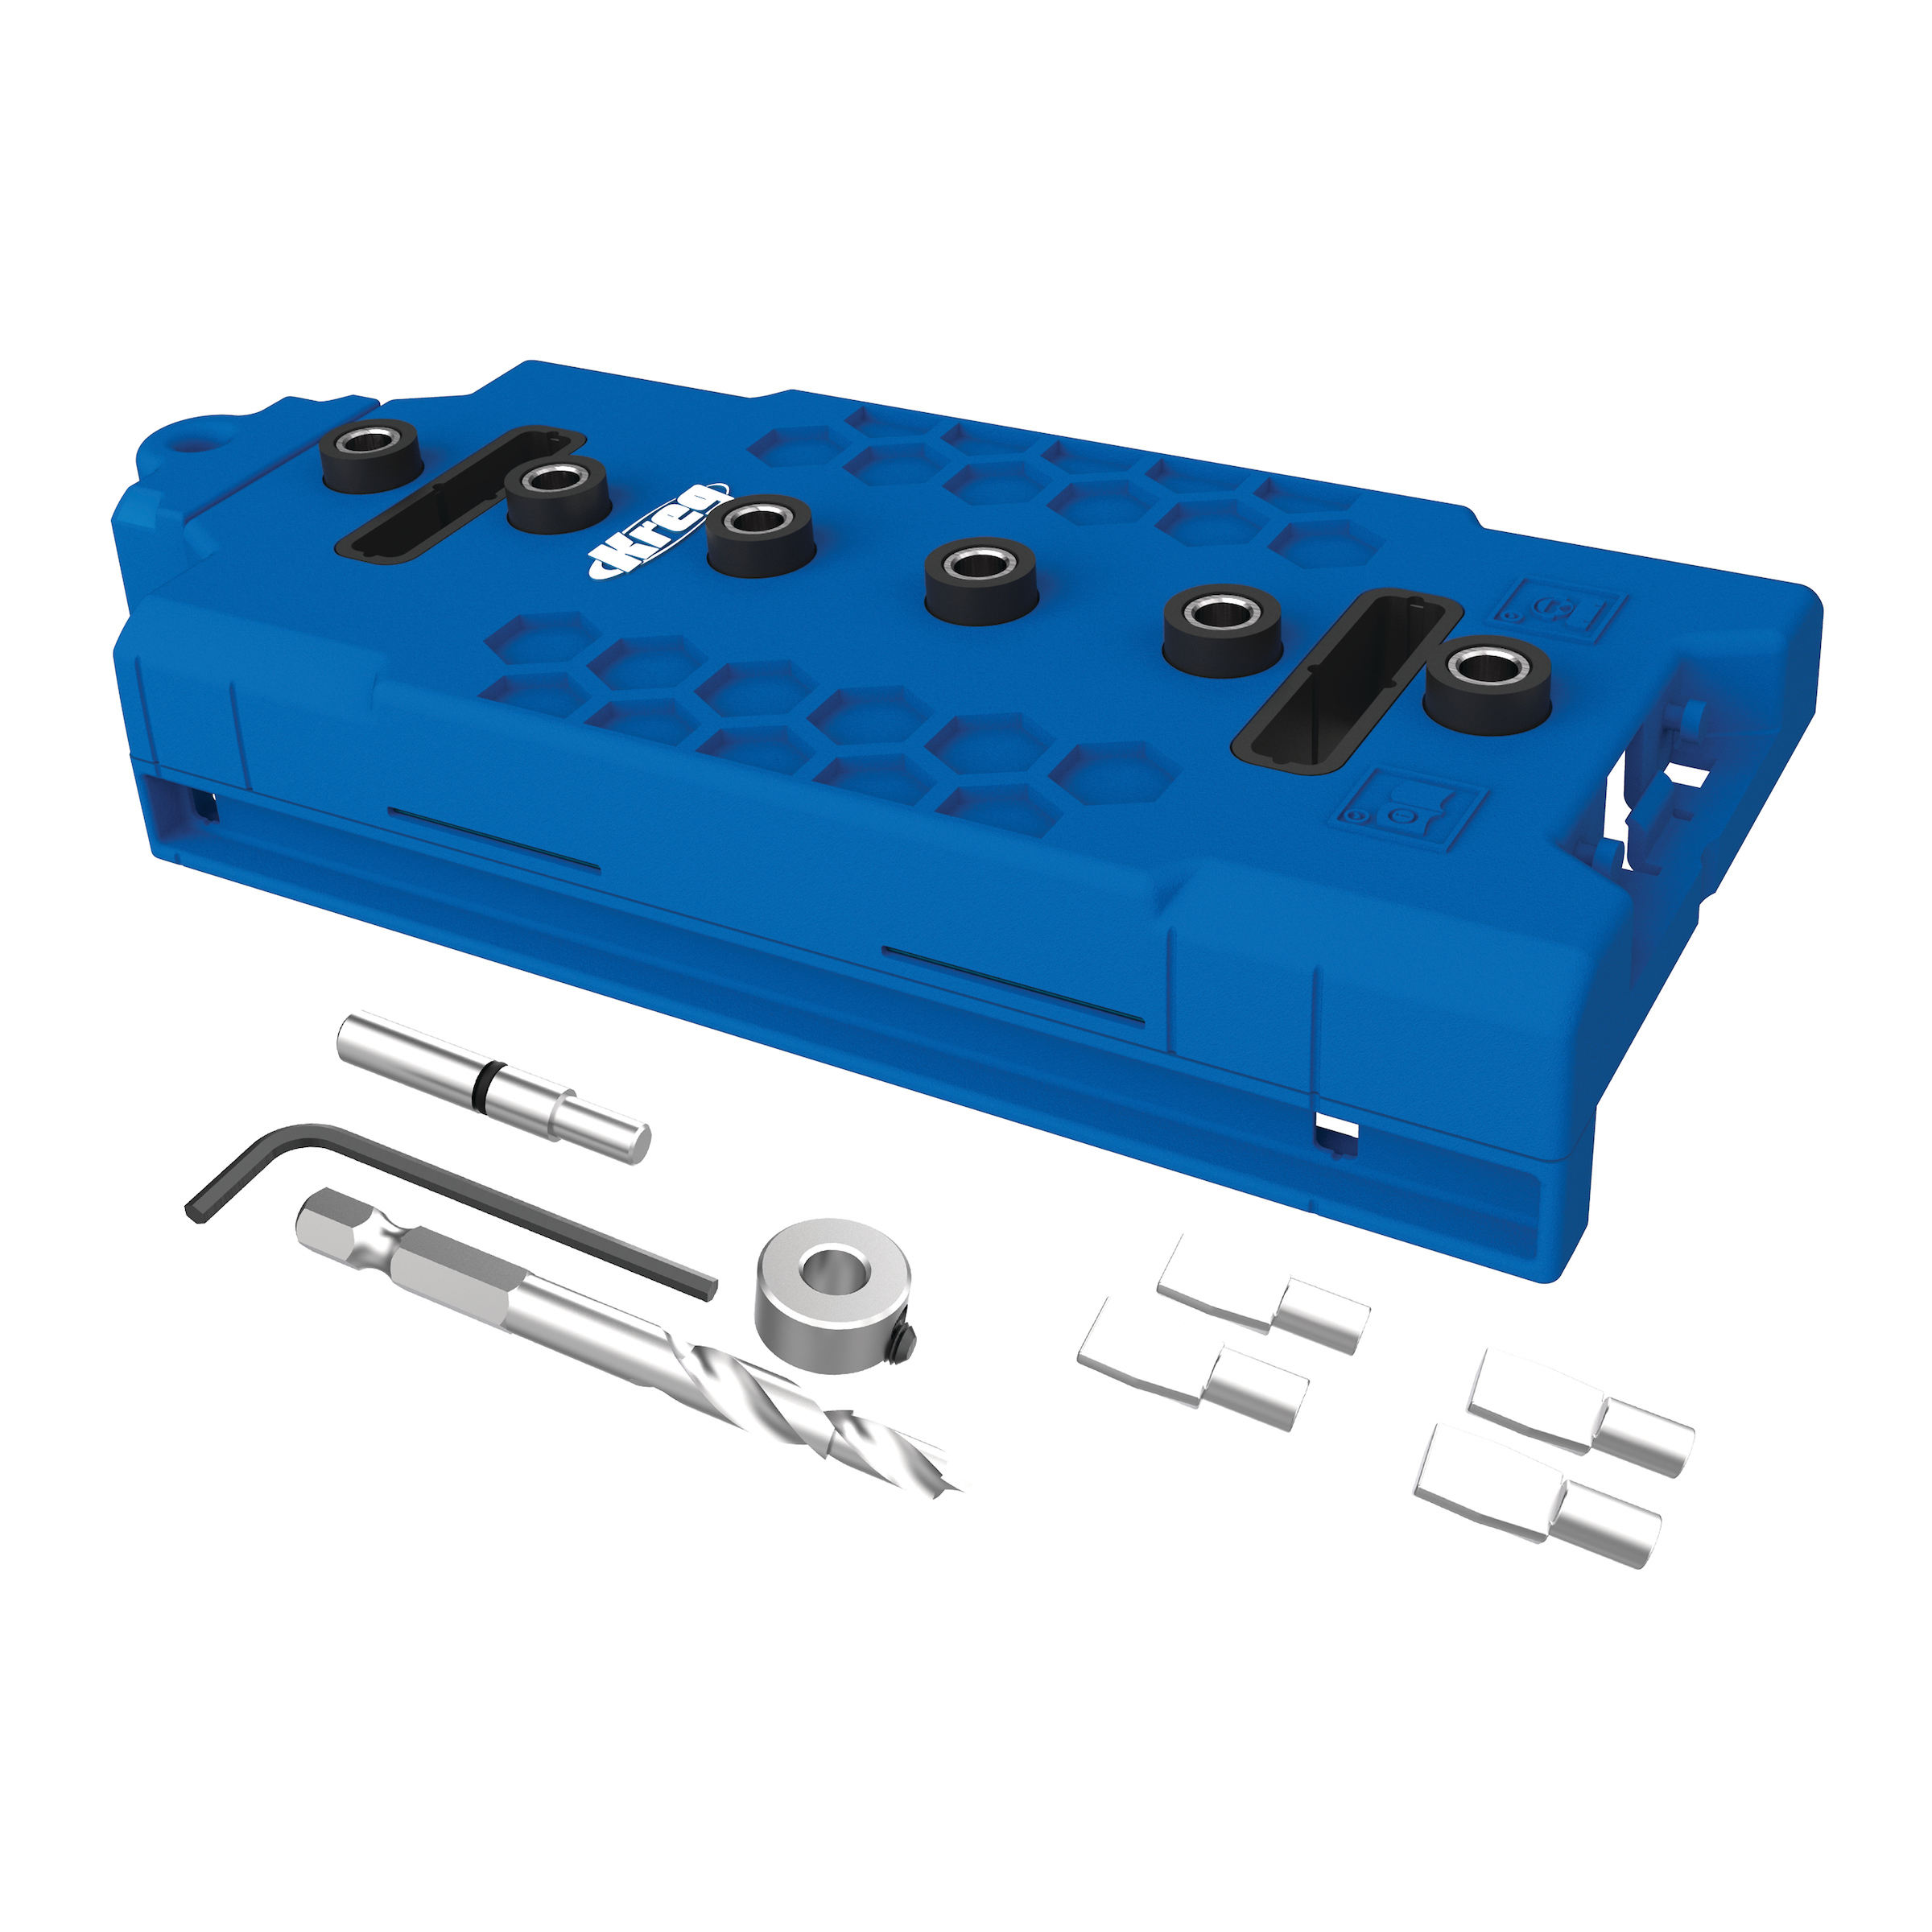
Cut two Dividers to the size from 3/4" plywood, as shown in the cutting diagram. With your Kreg Pocket-Hole Jig set up for 3/4"-thick material, drill pocket holes in one face of each Divider, as shown. Then Drill shelf-pin holes, as shown. A Kreg Shelf Pin Jig makes it easiest to get consistent spacing and straight holes, so you’ll have wobble-free shelves.
NOTE: The setback spacing (distance from the edge to the shelf-pin holes) shown matches the first-generation Kreg Shelf Pin Jig. The second generation model, released in March 2022, has different setback spacing. The vertical distance between the pin holes, though, matches the dimensions shown here—1 1/4". You can create the shelf-pin holes accurately using either the first- or second-generation jig.
-
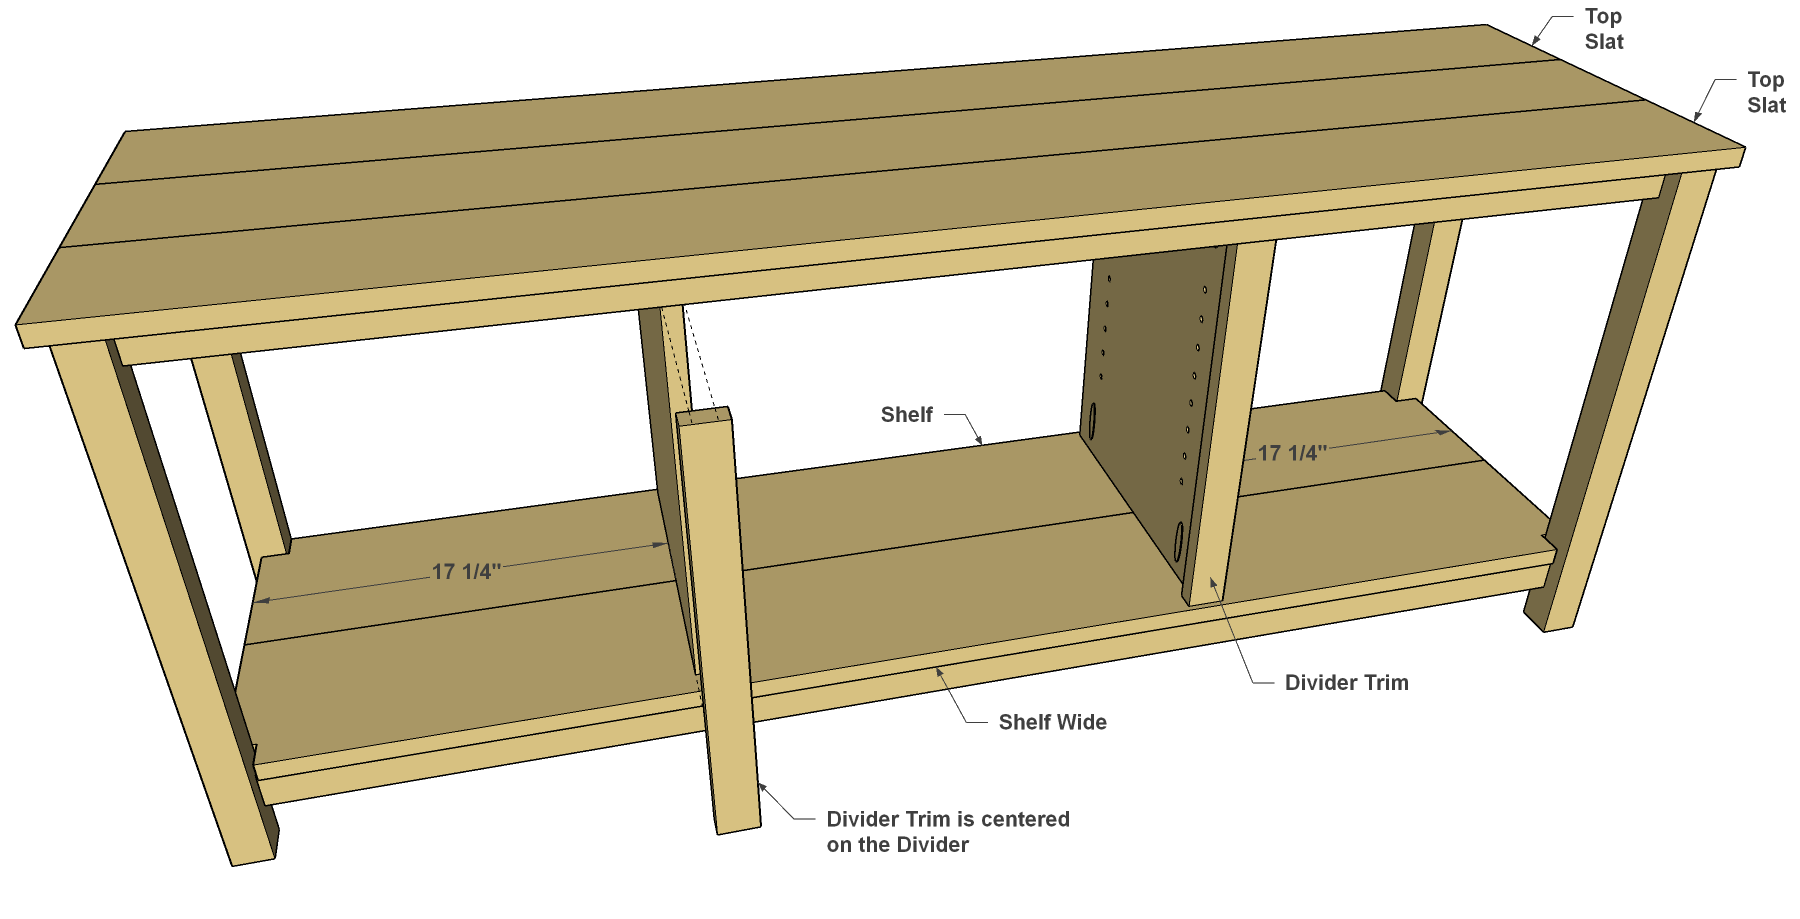
Make Trim and Install the Dividers
Cut two Divider Trim pieces to size from a 1x2 board, as shown in the cutting diagram. Now attach the Dividers, where shown, by driving 1 1/4" coarse-thread Kreg Pocket-Hole Screws into the Top Slats and Base Slats. Make sure the Dividers are straight and square before you drive the screws. Then nail on the Divider Trim pieces so they overhang the Divider equally on each side.
-
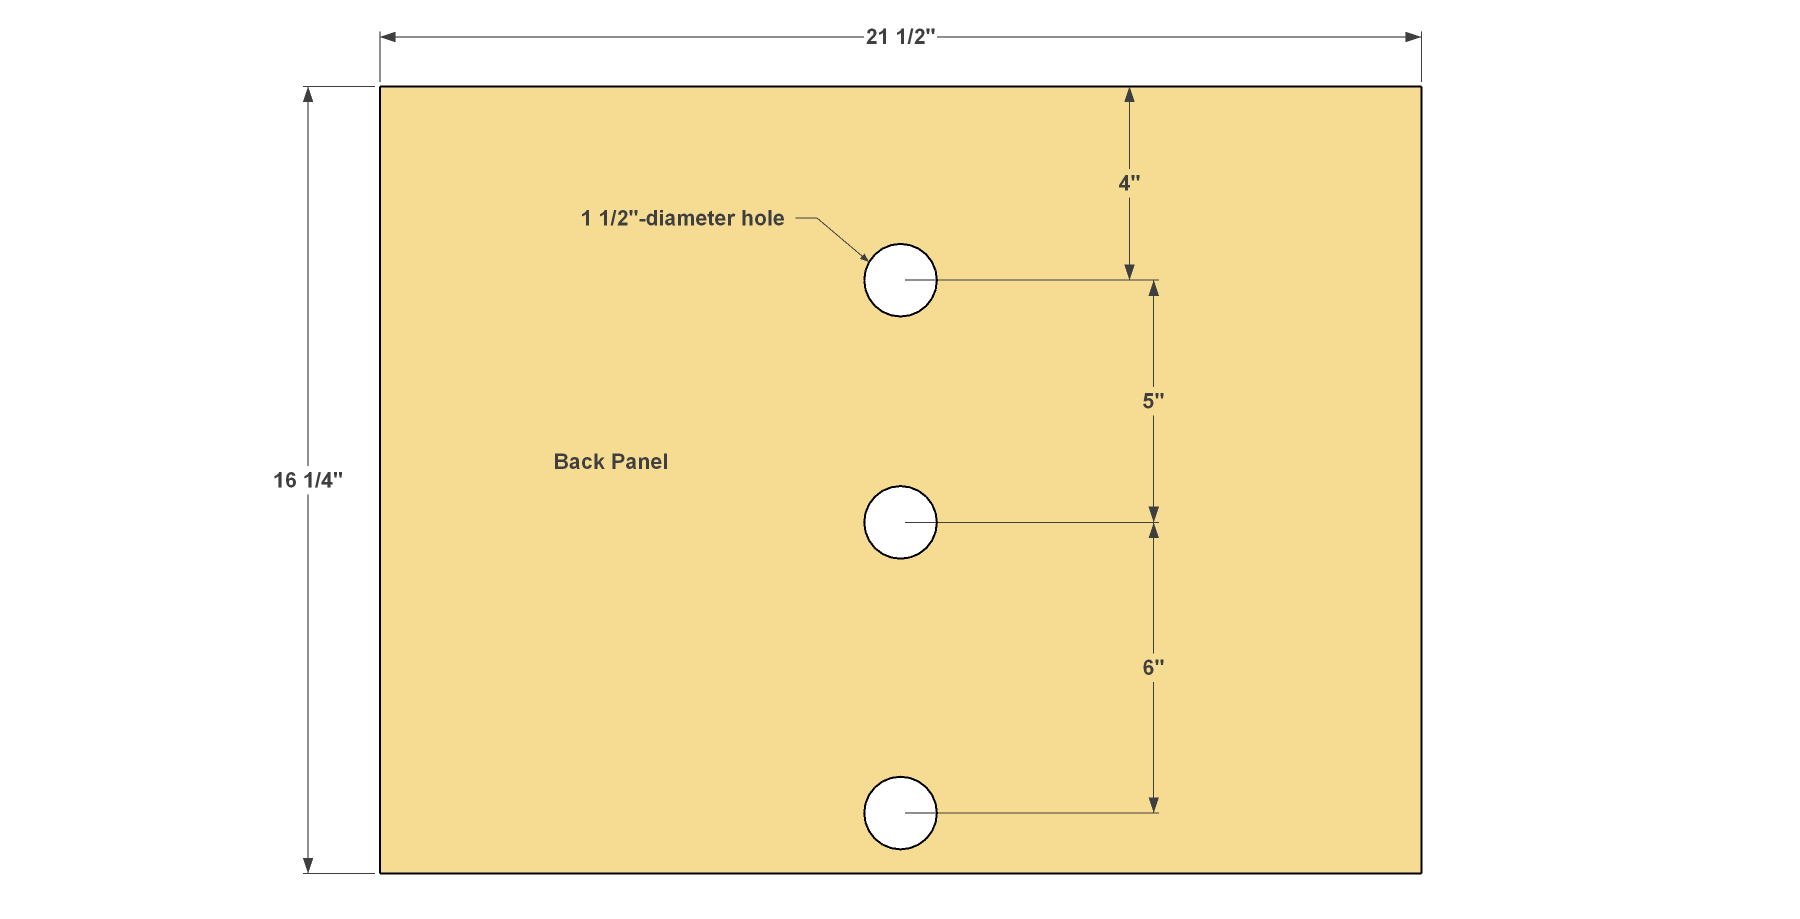
Create a Back Panel
Cut a Back Panel to size from 1/4" plywood, as shown in the cutting diagram. Then drill three holes for wires to pass through, as shown.
-
Button Up the Back
Attach the Back by nailing it to the back edges of the dividers with 1-1/4" brad nails. Do any final sanding that’s needed, and then add paint or finish you like to complete your TV stand. We used a gray stain.
